Planting
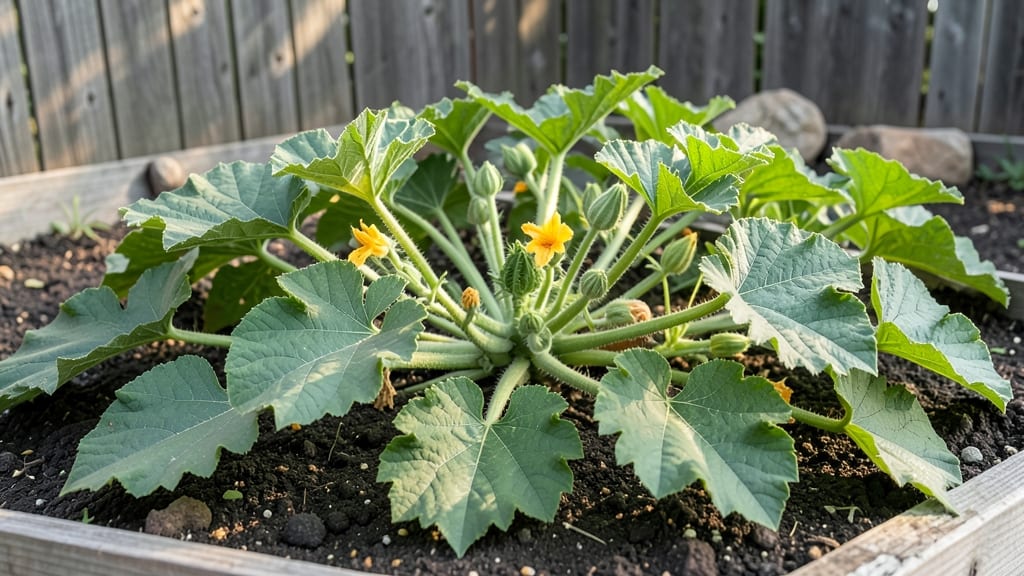
Understanding pumpkin plant buds turns a guessing game into a predictable harvest. 🌱 Those fuzzy, yellow-orange blossoms aren't just pretty—they're the key to your future pumpkins.
I've watched my vines go from sparse buds to bursting fruit just by paying attention to what these flowers need, and I'm sharing exactly how to make it happen for you.
The first buds appear about 4-6 weeks after planting, but not all will turn into fruit. Male flowers show up first—they're on long stems and don't have the little pumpkin-shaped ovary at the base.
Female flowers arrive later with that tiny fruit bump behind the blossom. The secret? Water consistently, especially when buds form, and give them full sun (6-8 hours daily) to keep blooms strong and productive.
What you'll get right is a vine covered in healthy female flowers that set fruit reliably. Each successful pollination means a pumpkin in 90-120 days, and with the right care, your plants will keep producing for weeks.
The difference between a handful of small gourds and a mountain of harvestable pumpkins comes down to these early stages—let's get them right.
This works for both bush and vining varieties, whether you're growing in ground or containers. The same principles apply no matter your space or climate zone, though hot afternoons in southern regions might need afternoon shade to protect delicate buds.
Let's break down exactly what to watch for and how to troubleshoot when things go sideways.
📚 In This Guide
- What you need
- Instructions
- Tips and common mistakes
- Wrapping up and next steps
What you need
- ● Pumpkin Seeds: 3–5 high-quality, heirloom or hybrid seeds (e.g., Cucurbita pepo, C. maxima, or C. moschata). Choose varieties suited to your climate (e.g., Jack Be Little for small spaces or Howden for giant pumpkins).
- ● Potting Mix or Garden Soil: For containers: 10–15 gallons of well-draining potting mix (add perlite or vermiculite for aeration).
- ● For in-ground planting: Loamy, fertile soil with a pH of 6.0–6.8. Amend with compost (2–3 inches mixed into the top 12 inches of soil).
- ○ Containers (Optional but Helpful): 5-gallon buckets or fabric grow bags (for small spaces or urban gardens). Ensure they have drainage holes.
- ● Fertilizer: Balanced 10-10-10 fertilizer (1 tbsp per plant at planting).
- ● Organic options: Composted manure (aged cow or chicken) or worm castings (1 cup per plant).
- ● Watering Can or Hose: With a gentle spray nozzle to avoid damaging tender buds.
- ● Mulch: Straw or black plastic mulch (to retain moisture and suppress weeds).
- ○ Trellis or Support (Optional): For bush varieties, use a small cage or stakes. Vining types need a 10–12 ft trellis or fence.
- ● Garden Gloves (to protect hands from prickly vines).
- ● Pruning Shears (for trimming excess buds or vines).
- ● pH Test Kit (to check soil acidity before planting).
- ○ Thermometer (optional, for monitoring soil/water temps—pumpkin seeds need 70–90°F to germinate).
- ● Row Cover or Shade Cloth (to protect young buds from pests or extreme sun).
- ● Sunlight: A spot with full sun (6–8+ hours daily). Pumpkin buds thrive in warmth!
- ● Warmth: Soil temperatures above 60°F (use a seedling heat mat if planting early).
- ● Space: Vining varieties need 50–100 sq ft per plant; bush types can grow in 20–30 sq ft.
- ● Patience: Pumpkin buds take 70–100 days to mature—plan accordingly!
How to identify and support pumpkin plant buds for fruit development
Here’s the exact method I use to turn those first flowers into heavy, healthy pumpkins.
🌱 Step 1: Recognize Male and Female Buds
Pumpkin plants produce two types of buds: male flowers (smaller, with a slender stem) and female flowers (larger, with a tiny pumpkin-shaped swelling at the base). I start checking buds when they’re about 2-3 inches wide—this is when you’ll see the difference clearly. Male flowers open first and have long, thin stems, while female flowers have a little bump at the base where the fruit will form.
Real talk: If you see more male flowers than female ones, don’t panic—it’s normal early on. The plant focuses on producing males first to help pollinate the females. Once you spot 3-4 female buds, you’re on the right track.
☀️ Step 2: Ensure Proper Pollination
Pumpkin flowers need pollinators like bees or wind to transfer pollen from male to female blooms. If you’re in an area with few bees, hand-pollinate by gently brushing the male flower’s pollen onto the female’s stigma (the fuzzy center) with a small paintbrush or cotton swab. Do this in the morning when flowers are fresh and sticky with pollen.
I’ve found that female flowers last only one day—they wilt by evening if not pollinated. Watch for the stigma to look slightly swollen after pollination; this means fertilization has started. If you see a tiny pumpkin forming within 3-5 days, you’ve succeeded!
💧 Step 3: Support Buds with Consistent Care
Female buds need steady watering—1-1.5 inches per week—but avoid overwatering, which can cause blossom-end rot later. I water at the base in the morning to let foliage dry before evening, reducing fungal risks. Fertilize with a balanced 10-10-10 mix every 2 weeks once buds appear, focusing on phosphorus to encourage flowering.
Thin crowded vines to 3-4 main stems per plant—this directs energy to fruit development. I prune leggy growth just above a leaf with a clean pair of scissors, always leaving a healthy node. You’ll see buds grow faster when the plant isn’t overburdened with excess foliage.
✂️ Step 4: Protect Developing Fruit
Once a female bud turns into a small pumpkin, shield it from pests like squash bugs and deer. I use row covers or netting for early development, removing them only after the pumpkin hardens slightly. Watch for signs of stress like yellowing leaves or soft spots—these can signal disease or pest damage.
If a pumpkin starts to rot, cut it off immediately to save the plant’s energy. Healthy pumpkins should feel firm and develop a waxy skin within 4-6 weeks of pollination. I’ve learned the hard way that ignoring early rot spreads quickly—don’t wait to act!
🌿 Step 5: Monitor for Fruit Set Success
By 6-8 weeks after pollination, you’ll know if your pumpkins are thriving. Look for deep green color, no cracks, and a stem that’s at least 1 inch thick. If a pumpkin stops growing or turns pale, it may need more sunlight—move the plant to a sunnier spot if possible.
Here’s the thing—pumpkins need space to grow. If they’re crowded, they’ll compete for nutrients and may produce smaller fruit. I’ve had the best luck spacing plants 4-6 feet apart in full sun, giving vines room to sprawl naturally.
Tips & tricks for perfect pumpkin bud development
Transforming those delicate pumpkin buds into plump, healthy fruit takes a few key insights that most gardeners miss.
Bud Identification Secret: When checking for female buds in Step 1, look for that tiny pumpkin-shaped swelling at the base—it's often hidden behind leaves. I've found that using a small hand lens helps spot these early signs, especially on crowded plants. The key is to catch them when they're about 2-3 inches wide, before they open completely. Don't confuse the tiny bumps with early fruit—real female buds will have that distinct swelling at the base.
Pollination Timing Matters: In Step 2, morning is absolutely critical for hand-pollination. That's when flowers are freshest and pollen is most abundant. I've noticed that female flowers open slightly earlier than males in the morning—watch for this and pollinate immediately. The one-day window is tight, so if you miss morning, try again at midday when flowers are still receptive. A gentle touch with your paintbrush works better than shaking stems, which can damage delicate petals.
Watering Wisdom: The 1-1.5 inches per week guideline in Step 3 is perfect, but timing matters just as much. I water at the base in the morning to let foliage dry completely before evening—a game-changer for preventing fungal issues. During hot spells, I increase to 2 inches per week but always check soil moisture first. The secret is keeping roots consistently moist without waterlogging, which can cause blossom-end rot in developing fruit.
Pruning Strategy: When thinning to 3-4 main stems in Step 3, focus on keeping the strongest, healthiest vines. I always look for stems with the most vigorous leaves and buds. The key is to prune just above a leaf node—this encourages new growth from that point. Don't be afraid to be aggressive with pruning early on; crowded plants produce smaller fruit. I've seen plants with 10+ vines struggle to develop quality pumpkins, while properly thinned plants produce fewer but larger, healthier fruits.
Pro Tips for Pumpkin Plant Buds
- Transforming those delicate pumpkin buds into plump, healthy fruit takes a few key insights that most gardeners miss.
- Bud Identification Secret: When checking for female buds in Step 1, look for that tiny pumpkin-shaped swelling at the...
- Pollination Timing Matters: In Step 2, morning is absolutely critical for hand-pollination. That's when flowers are f...
Frequently asked questions
Got questions about pumpkin plant buds?
You’re not alone! Here are some of the most common queries—plus quick answers to help you nurture those buds into perfect pumpkins.
Why aren’t my pumpkin plant buds turning into fruit?
If your buds aren’t fruiting, it could be due to pollination issues (especially in greenhouses or rainy climates), temperature extremes (below 70°F or above 90°F), or nutrient deficiencies. Hand-pollinate with a paintbrush or ensure bees visit daily. Also, check for pests like squash vine borers that may damage flowers before they set fruit.
How long does it take for pumpkin buds to become fruit?
After successful pollination, pumpkin buds typically take 7–10 days to drop (a normal sign!) and 10–14 days for the fruit to appear. Larger varieties (like giant pumpkins) may take slightly longer—patience is key! Track your planting date to estimate harvest time (usually 75–120 days for mature pumpkins).
Can I save pumpkin buds that fall off?
Unfortunately, fallen buds won’t regrow into fruit, but you can repurpose them! Use them in soups, stir-fries, or even fermented pickles (they’re packed with flavor). To prevent bud drop, ensure consistent watering (1–2 inches per week) and avoid over-fertilizing with nitrogen (which boosts leaves over fruit).
What’s the best way to hand-pollinate pumpkin buds?
Hand-pollination is easy! On a dry morning, gently open a male flower (long stem, no bulb) and use a paintbrush or cotton swab to collect pollen. Transfer it to the female flower’s stigma (the tiny bulb at the base of the petals). Do this for 3–5 flowers per plant to maximize fruit set. Repeat every 2–3 days for 1–2 weeks after buds appear.
My pumpkin buds are turning brown—what’s wrong?
Brown buds often signal blossom end rot (calcium deficiency), fungal diseases (like powdery mildew), or overwatering. Improve soil with crushed eggshells or lime, space plants for airflow, and water at the base (not leaves). If mildew is present, spray with neem oil or a baking soda solution (1 tsp baking soda + 1 quart water + a drop of dish soap).
Pro Tip:
Monitor your pumpkin plants daily during budding season. Remove male flowers (they drain energy) if you’re prioritizing fruit over seeds. And if you’re growing for decorative pumpkins (like mini varieties), you can skip pollination entirely—they’ll stay small and ornamental!
Wrapping up and next steps
Growing pumpkin plant buds into thriving vines and delicious fruit is a rewarding journey—one that starts with patience, proper care, and a little know-how! 🌱 Whether you’re a first-time gardener or a seasoned green thumb, understanding the flower-to-fruit process unlocks the secret to a bountiful harvest.
Now that you’re armed with tips on pollination, soil prep, and troubleshooting, it’s time to roll up your sleeves and watch those buds transform into pumpkins!
Your next step? Plant those seeds or seedlings and keep an eye on those blossoms—soon, you’ll be celebrating a harvest fit for a jack-o’-lantern or a cozy pie! 🎃✨