Propagation
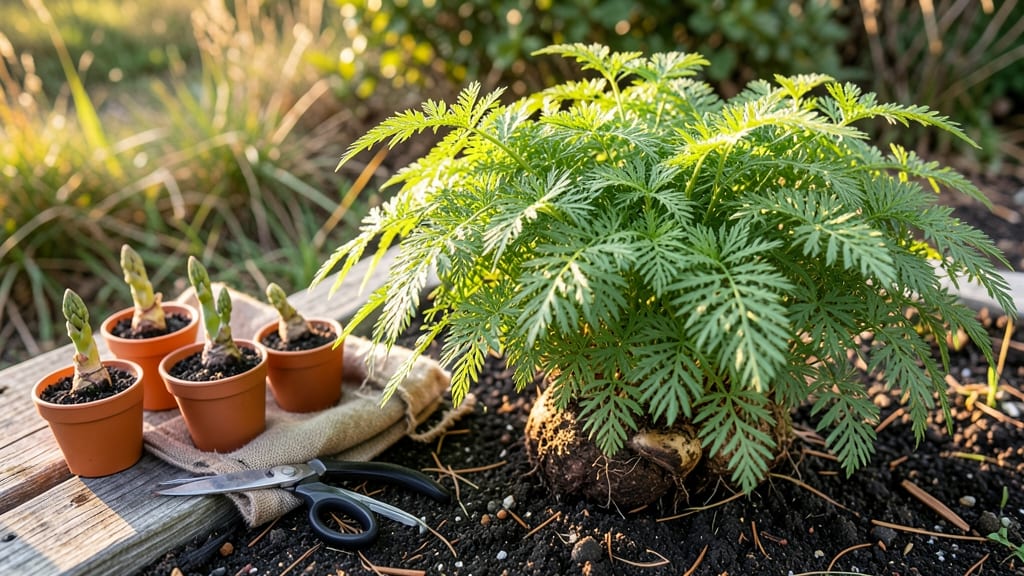
Propagating asparagus plants from mature crowns is the fastest way to get your own perennial harvest—though I nearly gave up after my first attempt left me with sad, yellowing fronds.
The key isn’t just digging up roots; it’s timing the division right, prepping the soil just so, and giving those new crowns the patience they need to establish before spears appear.
You’ll need a well-draining soil mix, a sunny spot with at least 6 hours of light daily, and a bit of elbow grease for dividing.
Crowns should be 3–4 inches thick with healthy roots, and planting in early spring or fall gives them the best chance to settle before summer heat. Water deeply after planting, then keep the soil consistently moist but never soggy—this is where most beginners trip up.
Within two years, those carefully divided crowns will reward you with vibrant green spears that shoot up in early spring, thicker and more abundant than anything you’d buy at the store.
The first year might look sparse, but by year three, you’ll have a lush patch that keeps producing for decades with minimal effort. The secret? Letting the ferns grow tall and die back naturally—they’re feeding the roots for next year’s harvest.
Works in zones 3–10, though cooler climates get the best spears. If you’re in a hotter zone, mulch heavily to keep roots cool. Now grab your shovel—this is the one propagation method that pays off in patience and perseverance.
📚 In This Guide
- What you need
- Instructions
- Tips and common mistakes
- Wrapping up and next steps
What you need
- ● Asparagus crowns or seeds: For crowns: 1-year-old or older (preferably disease-free) – 2-4 crowns per planting area (spaced 12-18 inches apart).
- ● For seeds: Organic, non-hybrid asparagus seeds (germination can take 2-3 weeks).
- ● Garden soil: Well-draining, sandy loam with a pH of 6.5-7.5. Mix in 2-3 inches of compost for nutrients.
- ● Fertilizer: Balanced 10-10-10 or 5-10-10 (low nitrogen initially to avoid foliage overgrowth).
- ● Organic options: Aged manure, bone meal, or composted cow manure.
- ● Mulch: Straw or wood chips (2-3 inches thick) to retain moisture and suppress weeds.
- ● Watering can or hose: With a gentle spray nozzle for even moisture distribution.
- ● Pruners or sharp knife: For clean cuts when dividing crowns.
- ● Garden fork or trowel: For digging trenches (6-8 inches deep) or planting holes.
- ○ Row covers or frost cloth: (Optional but helpful for young plants in cooler climates.)
- ● Soil tester kit: To check pH and nutrient levels before planting.
- ● Epsom salt (magnesium sulfate): 1 tablespoon per plant annually for healthy growth.
- ● Drip irrigation system: For consistent moisture during the first growing season.
- ● Plant labels: To track varieties and planting dates.
- ● Garden gloves: To protect your hands while handling soil and crowns.
Step-by-Step instructions for propagating asparagus plants
Here’s how to grow healthy asparagus crowns into productive perennials with minimal fuss.
Select Healthy Asparagus Crowns
Choose 1-year-old asparagus crowns from a trusted nursery or garden center. Look for crowns with multiple firm, white buds—these are your future spears. Avoid crowns with yellowing or mushy sections, as they’ll rot before establishing. I always inspect the roots for any signs of disease or damage, trimming away any brown or slimy areas with clean scissors.
If you’re dividing an existing asparagus patch, dig up healthy, established crowns in early spring or fall. Use a sharp spade to lift the entire root system, then separate the crowns into 4-inch sections, ensuring each piece has at least three buds. Handle them carefully—roots bruise easily, and damaged crowns struggle to take.
Prepare the Planting Site
Asparagus thrives in full sun and well-draining soil with a pH between 6.5 and 7.5. Work in 3-4 inches of compost into the top 12 inches of soil to improve fertility and drainage. I like to add a 5-10-10 fertilizer at planting to give the crowns a nutrient boost right away—just follow the package rate for a 10-foot row.
Dig a 6-inch deep trench or hole, spacing crowns 12-18 inches apart in rows 3 feet apart. The trench method keeps spears accessible later, but individual holes work too. Avoid fresh manure or high-nitrogen fertilizers—too much nitrogen encourages leafy growth at the expense of root development, delaying your harvest.
Plant the Crowns Correctly
Place each crown in the trench or hole with the buds facing upward and the roots spread out evenly. Cover the crown with 2-3 inches of soil, leaving the buds exposed. This ensures they stay dormant until spring while roots establish. Water deeply to settle the soil and remove air pockets around the roots.
Mulch the area with 2-3 inches of straw or wood chips to retain moisture and suppress weeds. I always label the row with wooden stakes since asparagus takes 2 years to establish before harvesting. Avoid disturbing the soil around the crowns—they’re sensitive to root damage in their first year.
Maintain Through the First Year
Keep the soil evenly moist but not soggy—asparagus roots rot in waterlogged conditions. Water 1-2 times per week, depending on rainfall, until the plants are 2 feet tall. At that point, let the soil dry slightly between waterings to toughen the spears. Fertilize lightly in early spring with a balanced fertilizer (like 10-10-10) to support root growth.
Resist the urge to harvest spears in the first year—even if they look tempting. Allow the foliage to grow tall and die back naturally. This builds energy reserves in the roots for next year’s harvest. Cut back dead fronds in late fall or early winter, leaving 2 inches of stubble to protect the crowns from freezing temperatures.
Prepare for Year Two and Beyond
By year two, your asparagus should produce spears ready for harvest. Start cutting spears in early spring when they’re 6-8 inches tall and still tender. Harvest no more than 10-15% of the spears the first year to avoid weakening the plants. I always harvest in the morning when spears are firmest, cutting them at ground level with a sharp knife.
Continue fertilizing in early spring with a low-nitrogen fertilizer (like 5-10-10) to encourage root and spear growth. After the harvest season, let the foliage grow until late summer or early fall, then cut it back again. With proper care, a well-established asparagus patch can produce spears for 15-20 years—making the wait totally worth it.
Tips & tricks for perfect asparagus propagation
Growing asparagus from crowns is a rewarding long-term investment, but a few key strategies will help you avoid common pitfalls and maximize your harvest potential.
Selection is Everything: In Step 1, when choosing crowns, prioritize those with at least three firm, white buds—these are your future spears. I can't stress enough how important it is to avoid crowns with any signs of yellowing or sliminess. Even a small amount of rot can spread to healthy sections once planted. Pro tip: If dividing an existing patch, work in early spring when the soil is workable but before new shoots emerge. This gives you the best chance of transplanting healthy, undamaged crowns.
Soil Preparation Matters More Than You Think: The 3-4 inches of compost you work into the top 12 inches of soil in Step 2 isn't just about nutrients—it's about creating the perfect environment for those delicate roots. I've found that adding a handful of perlite or coarse sand helps improve drainage, especially in clay-heavy soils. This prevents the waterlogged conditions that asparagus roots absolutely hate. And remember, that 5-10-10 fertilizer application should be light—follow the package rate for a 10-foot row, not the entire garden.
Planting Depth and Mulch Strategy: When covering your crowns with just 2-3 inches of soil in Step 3, think of it like tucking them in for a nap—they need to stay dormant while roots establish. The mulch layer isn't just decorative: that 2-3 inches of straw or wood chips acts like a blanket, keeping moisture consistent while suppressing weeds. I've learned the hard way that letting weeds compete with young asparagus plants can stunt their growth significantly. Labeling your rows with wooden stakes is crucial too—those first two years fly by, and you don't want to accidentally disturb new shoots.
Watering Wisdom for First-Year Growth: The 1-2 times per week watering guideline in Step 4 can be tricky—especially when your plants reach 2 feet tall. At that point, I switch to letting the soil dry slightly between waterings to help toughen the spears. But here's the secret: water deeply each time, encouraging those roots to grow downward where they'll find moisture during dry spells. And never water overhead once the plants are established—wet foliage invites fungal diseases that can devastate your patch.
Pro Tips for Propagating Asparagus Plants
- Growing asparagus from crowns is a rewarding long-term investment, but a few key strategies will help you avoid commo...
- Selection is Everything: In Step 1, when choosing crowns, prioritize those with at least three firm, white buds—these...
- Soil Preparation Matters More Than You Think: The 3-4 inches of compost you work into the top 12 inches of soil in St...
Frequently asked questions
Got questions about propagating asparagus? You’re not alone—this perennial veggie takes patience and care! Here are answers to the most common queries to help you grow strong, productive plants with confidence.
How do I know when asparagus crowns are ready for planting?
Choose healthy, mature asparagus crowns from plants that are 3–4 years old (or older). Look for plump, firm crowns with white or light tan buds—avoid woody, shriveled, or diseased ones. The best time to dig them is in early spring (before new shoots emerge) or fall (after harvest but before hard frost).
Can I propagate asparagus from seed instead of crowns?
Yes, but it’s slower—seeds take 2–3 years just to produce spears, while crowns yield harvests in 1–2 years. If you’re patient, sow seeds ½ inch deep in well-draining soil, keep them moist, and thin seedlings to 6–12 inches apart. For faster results, crown division is the winner!
What’s the best soil temperature for planting asparagus crowns?
Wait until the soil warms to 50–60°F (10–15°C)—this ensures roots establish before summer heat. Test by pressing your finger 2 inches deep: if it’s cool but not icy, it’s time! Fall planting also works in mild climates (Zone 7+), but cover crowns with 4–6 inches of mulch to protect them over winter.
Why aren’t my asparagus ferns growing after transplanting?
Slow growth usually means stress from transplant shock. Check these fixes:
Patience is key—ferns may take 6–8 weeks to bounce back!
How often should I divide asparagus crowns to keep them productive?
Divide every 3–4 years in early spring to rejuvenate plants. Dig up the crown, separate into 3–4 inch sections (each with buds), and replant sections 12–18 inches apart. This prevents overcrowding, boosts spear production, and reduces disease risk. Pro tip: Discard old, woody centers—they won’t regrow well!
Wrapping up and next steps
Propagating asparagus from crowns or seeds is a rewarding way to grow a perennial harvest that’ll thrive for years! With patience and care—like choosing the right soil, spacing crowns properly, and protecting young plants—you’ll enjoy fresh spears in just two seasons. 🌱✨
Ready to get started? Dig in today—your future garden (and taste buds) will thank you! For extra tips, check out our guide on asparagus care basics next.