Container Gardens
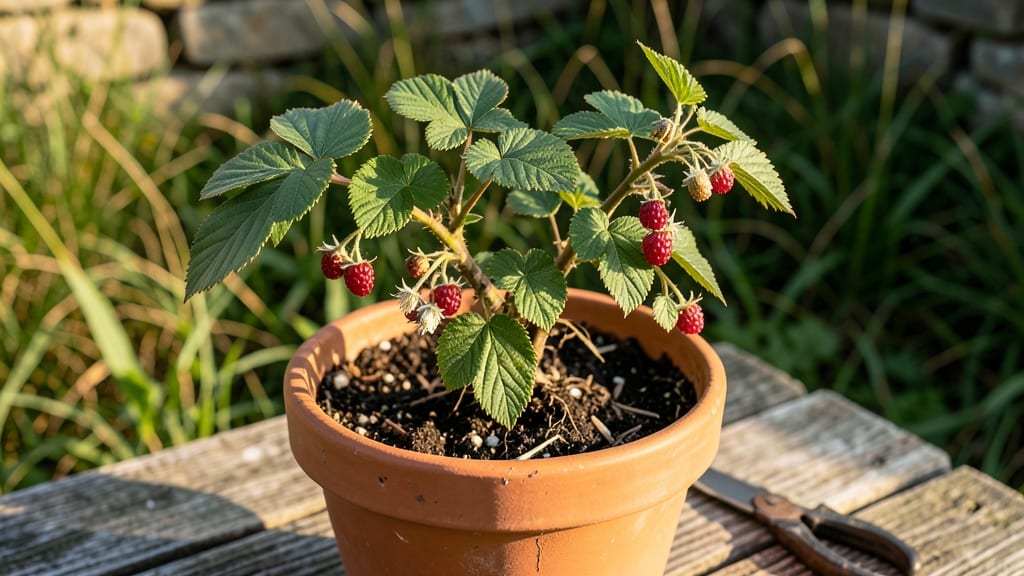
My potted raspberry plants have turned my balcony into a berry-producing paradise—all thanks to three simple pruning steps that keep them thriving year after year. 🌱 year.
The key is understanding how raspberries grow differently in pots compared to the ground, and I'll show you how to mimic their natural habits without the fuss.
You don't need a greenhouse or special equipment—just the right container size (at least 18 inches deep and wide), well-draining soil, and a sunny spot that gets 6-8 hours of light daily.
My setup uses a large fabric grow bag that prevents root circling, and I've found that adding compost every spring keeps the soil rich without overwhelming the roots. The biggest shift from traditional growing?
Pruning becomes simpler when you can see the entire root system, and you can move the plant to protect it from frost or pests.
By following these three pruning steps—cutting back old canes in late winter, thinning new growth in early summer, and cleaning up after harvest—you'll end up with canes that produce berries for years instead of just one season.
The berries stay sweet, the plant stays compact, and you avoid the common pitfalls of potted raspberries like root-bound stress or nutrient deficiencies. Plus, you get to harvest fresh berries without bending over a garden bed.
Works perfectly for balconies, patios, or even sunny windowsills with the right light setup. The mobility means you can rotate plants for even sunlight exposure or move them indoors during extreme weather. Here's how to get started without the guesswork!"
📚 In This Guide
- What you need
- Instructions
- Tips and common mistakes
- Wrapping up and next steps
What you need
- ● Potted raspberry plants: 1-3 canes (choose floricocana varieties like 'Heritage' or 'Boyne' for container-friendly growth).
- ● Containers: 1-2 large pots (18-24" diameter, 18"+ deep) with drainage holes. Tip: 💡 Use lightweight materials like fabric or plastic to avoid straining your back!
- ● Potting mix: 3-5 gallons of well-draining, organic-rich soil (e.g., 60% potting soil + 30% compost + 10% perlite).
- ● Fertilizer: Balanced organic fertilizer (10-10-10) or raspberry-specific formula. Pro tip: ✨ Slow-release granules work best for potted plants!
- ● Pruning shears: Sharp, clean bypass pruners (sterilize with rubbing alcohol).
- ○ Mulch: 2-3 inches of straw or wood chips (optional but helps retain moisture).
- ● Support system: 1-2 small trellises or stakes (4-6 ft tall) for vertical growth.
- ● Sunlight: 6-8 hours of direct sun daily (partial shade in hot climates).
- ● Watering routine: Consistent moisture (1-2 inches per week; pots dry faster!).
- ● Location: Wind-protected spot (raspberries dislike strong breezes).
- ● Knowledge: Basic understanding of raspberry growth cycles (primocanes vs. floricanes).
- ● Soil moisture meter (to avoid over/under-watering).
- ● Epsom salt (for magnesium boost, especially in acidic soils).
- ● Drip irrigation kit (for automated watering).
- ● Companion plants (e.g., thyme or borage to deter pests).
Step-by-Step guide to pruning potted raspberry plants
Here's how to keep your potted raspberries lush and productive with minimal effort.
✂️ Step 1: Remove Dead or Damaged Canes
Start by inspecting your potted raspberries for any canes that are brown, brittle, or showing signs of disease. These dead canes steal energy from healthy growth, so they need to go first. Grab a pair of clean, sharp pruners and snip at a 45-degree angle just above a healthy bud or lateral branch.
I always work from the bottom up—this helps me spot hidden damage as I go. If a cane is hollow or oozing sap, it's definitely time to remove it. You'll know you're doing it right when you're left with only vibrant green canes that feel firm to the touch.
✂️ Step 2: Prune Overcrowded Growth
Next, focus on thinning out overcrowded canes to improve air circulation and sunlight penetration. Aim to leave 3-5 of the strongest, most vigorous canes per pot—this gives your raspberries room to breathe and produce better fruit. Use your pruners to cut back any thin, weak canes at the base, making sure to leave a smooth cut.
Here's the thing—raspberries grow fast, and if you let them get too crowded, you'll end up with small, poor-quality berries. After pruning, step back and take a look at your pot. You should be able to see light reaching the center of the plant and feel a gentle breeze moving through the canes.
✂️ Step 3: Trim Back Last Year's Fruit Canes
Raspberries produce fruit on two types of canes: floricanes (last year's growth) and primocanes (this year's new growth). For summer-bearing varieties, cut back all the floricanes—those are the canes that bore fruit last season—down to the ground. This might seem drastic, but it encourages your plant to focus energy on producing new, fruitful canes.
For fall-bearing varieties, you'll want to leave some floricanes, but I'll let you research that specific need. After trimming, give your plant a good drink of water to help it recover. You'll notice new green shoots emerging within 2-3 weeks, signaling that your pruning worked.
💧 Step 4: Clean Up and Fertilize
Once you've finished pruning, gather up all the clippings and dispose of them in the trash—not the compost pile. Raspberry canes can harbor diseases that might reinfect your plants, so it's best to err on the side of caution. After cleaning up, apply a balanced fertilizer (like 10-10-10) to encourage strong new growth.
Water your potted raspberries deeply after fertilizing to help the nutrients soak into the soil. You'll see the difference in just a few weeks as your canes thicken and new leaves unfurl. This is the moment that matters—your plant is now set up for a bountiful harvest.
Tips & tricks for perfect potted raspberry pruning
These simple strategies will help you maintain healthy, productive raspberry canes with minimal effort.
Pruning Angle Matters: When you cut at that 45-degree angle in Step 1, you're not just making a pretty cut—you're creating a larger surface area for water absorption. This helps prevent rot at the cut site. I also like to dip my pruners in rubbing alcohol between cuts to sterilize them, especially if I notice any signs of disease on the canes. This small step prevents cross-contamination that could spread to healthy canes.
The 3-5 Cane Rule: In Step 2, leaving 3-5 of the strongest canes might feel counterintuitive if your pot looks crowded, but trust me on this. These vigorous canes will produce the largest, sweetest berries. Thin out any canes that are leaning against each other—they'll compete for sunlight and nutrients. You'll know you've got the right balance when you can see sunlight reaching the center of the plant without having to push through the canes.
Timing is Everything: That 2-3 week window in Step 3 for new shoots to emerge is critical. If you prune too late in the season, your plant won't have enough time to establish new growth before winter. I always aim to finish pruning by early spring, giving my plants plenty of growing time. Watch for the first signs of new growth—those tiny green shoots are your reward for proper pruning.
Fertilizer Application: When you apply that balanced fertilizer in Step 4, water it in thoroughly. I like to use a slow-release fertilizer to avoid burning the roots. You'll notice the difference in just a few weeks as your canes thicken and new leaves unfurl. This is when your plant is really starting to reward you for your efforts.
Pro Tips for Potted Raspberry Plants
- These simple strategies will help you maintain healthy, productive raspberry canes with minimal effort.
- Pruning Angle Matters: When you cut at that 45-degree angle in Step 1, you're not just making a pretty cut—you're cre...
- The 3-5 Cane Rule: In Step 2, leaving 3-5 of the strongest canes might feel counterintuitive if your pot looks crowde...
Frequently asked questions
Got questions about growing potted raspberry plants?
You’re not alone! Here are answers to the most common queries—from pruning to harvest—to help you grow thriving canes in containers.
Can raspberries grow well in pots long-term?
Yes! With the right container (at least 18-24 inches deep) and well-draining soil, raspberries thrive in pots for years. Just ensure the pot has drainage holes and refresh the soil every 2-3 years to prevent nutrient depletion. Dwarf varieties like ‘Boyne’ or ‘Heritage’ are ideal for containers.
When is the best time to prune potted raspberry plants?
Prune summer-bearing raspberries in late winter/early spring (before new growth starts) and fall-bearing types in late winter or summer after harvest. Remove dead, weak, or crossing canes first, then thin to 4-6 strongest canes per plant for airflow and productivity.
Why aren’t my potted raspberries fruiting?
Common culprits include overcrowded canes, poor sunlight (<6+ hours/day), or nutrient deficiencies. Check your plant’s needs: feed with a balanced fertilizer in spring, ensure full sun, and prune aggressively to encourage new fruiting canes. If canes are <1 year old, they won’t fruit—be patient!
How do I protect potted raspberries from extreme heat or cold?
Raspberries prefer 50–75°F temps. In heat, move pots to partial shade and mulch with straw to retain moisture. For cold, wrap pots in burlap or frost cloth and insulate the base with foam boards. Avoid pots that freeze solid—use black or dark-colored containers to absorb heat.
What’s a good alternative if my raspberries fail in pots?
Try blackberries, alpine strawberries, or dwarf blueberries—they’re also container-friendly! For raspberry-like flavor, loganberries or boysenberries (thornless varieties) work well in pots. Just ensure your container meets their depth and drainage needs, and match their sunlight requirements.
Wrapping up and next steps
Growing potted raspberry plants is a rewarding experience—with just a few simple pruning steps, you can keep your canes healthy, productive, and thriving! 🌱 Whether you're a seasoned gardener or a beginner, these techniques will help you maximize your harvest while maintaining a neat, manageable plant.
Now that you’re equipped with the knowledge, roll up your sleeves and give your potted raspberries the care they deserve—your future berry feasts will thank you!
Ready to take the next step? Start by inspecting your plants this season and prune with confidence!