Transplanting
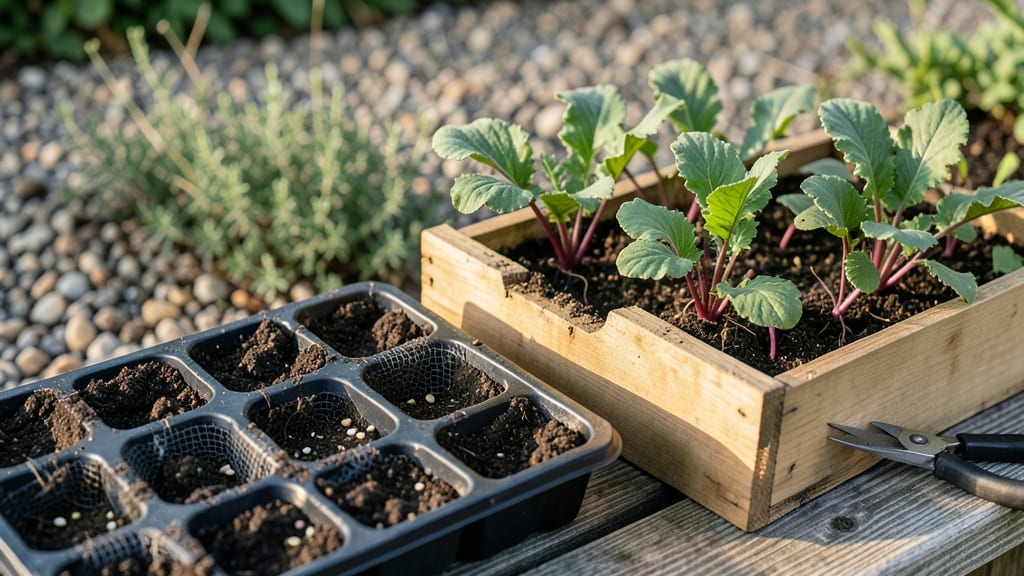
Planting radish seedlings delivers crisp, ready-to-harvest roots in just three weeks—the fastest edible crop you’ll grow. I’ve learned that skipping the transplanting step and sowing seeds directly saves time and stress, but if you’re working with seedlings, timing and soil prep make all the difference.
The key is getting them in the ground quickly after they sprout, before they outgrow their containers and become leggy.
You’ll need loose, well-draining soil mixed with compost—radishes hate compacted earth—and a sunny spot where they’ll get at least 6 hours of light daily. Space seedlings 1-2 inches apart in rows 12 inches apart to prevent crowding, which leads to stunted roots.
Plant them shallow—just ½ inch deep—so they don’t struggle to push through thick soil. The faster they establish, the quicker you’ll taste those peppery rewards.
After planting, keep the soil consistently moist but not soggy—radishes won’t forgive drought stress. A light mulch of straw helps retain moisture and keeps weeds at bay. In 21 days, you’ll be pulling bright red, firm roots straight from the garden.
The best part? You can succession plant every 2 weeks for a never-ending harvest through fall.
Here’s the secret most beginners miss: if your seedlings look weak or yellow, they’re begging for nitrogen. A side dressing of compost or a balanced fertilizer midway through their growth will give them the boost they need.
And if you’re in a hot climate, opt for faster-maturing varieties like ‘Cherry Belle’—they’ll beat the heat and still deliver in record time.
📚 In This Guide
- What you need
- Instructions
- Tips and common mistakes
- Wrapping up and next steps
What you need
- ● Radish seedlings: 10–20 healthy, 1–2 week-old seedlings (check for sturdy stems and vibrant leaves).
- ● Garden bed or containers: For in-ground: A 6–12 inch deep, well-draining bed (6–12 inches apart in rows, 1–2 inches between seedlings).
- ● For containers: 6–8 inch deep pots (1–2 seedlings per pot) or a long, shallow trough (seedlings spaced 2 inches apart).
- ● Soil: Loose, fertile soil with a pH of 6.0–7.0 (amend with compost if needed).
- ● Watering can or hose: With a gentle spray nozzle for even moisture.
- ● Garden trowel or transplanting tool: For digging small holes (1–2 inches deep).
- ○ Organic fertilizer (optional): Balanced 10-10-10 or compost tea to boost growth.
- ● Mulch: Straw or shredded leaves to retain moisture and suppress weeds.
- ● Row covers: Lightweight fabric to protect seedlings from pests or cold snaps.
- ● Plant labels: To track varieties (e.g., ‘Cherry Belle’ or ‘French Breakfast’).
- ● Gloves: For comfort while handling soil or seedlings.
Instructions for planting radish seedlings: a quick guide to fast growth
Here’s how to get your radish seedlings in the ground for a rapid, rewarding harvest in just three weeks.
Prepare the Soil for Optimal Root Development
Radishes thrive in loose, well-draining soil that encourages quick root expansion. Work the soil to a depth of 6 inches, breaking up any clumps and removing rocks or debris that could hinder root growth. I like to mix in 1 tablespoon of 5-10-5 fertilizer per 4 square feet into the top 4 inches of soil—this gives the seedlings a nutrient boost without overwhelming them.
Test the soil moisture before planting. It should feel like a damp sponge—press your finger into it about 1 inch deep. If it feels dry, water lightly until the top 2 inches are evenly moist. Avoid soggy soil, as radishes rot easily when their roots sit in waterlogged conditions. A well-prepared bed ensures your seedlings establish quickly and grow strong.
Space and Plant Seedlings for Even Growth
Radishes grow best when spaced 1-2 inches apart in rows that are 12-18 inches apart. Use a trowel to make small holes—just deep enough to bury the seedlings’ roots without folding the stems. Gently remove each seedling from its container, loosen the roots if they’re tightly bound, and place it in the hole.
Press the soil lightly around the base to secure the seedling, but don’t pack it down too firmly. This keeps the roots from struggling to push through compacted soil. If planting in cooler weather, consider a light row cover to protect young seedlings from temperature swings. Watch for the first signs of new leaf growth—this means the roots have anchored and are ready to expand.
Water and Maintain Moisture for Rapid Growth
Water the seedlings deeply right after planting to settle the soil and eliminate air pockets around the roots. Use a watering can with a fine rose to avoid dislodging the plants. Keep the soil consistently moist—never soggy—by watering every 2-3 days or whenever the top 1 inch feels dry. Radishes are shallow-rooted, so maintaining even moisture prevents bitterness and ensures crisp, tender roots.
Mulch the soil with 1 inch of straw or shredded leaves to retain moisture and suppress weeds. This is especially helpful in hot weather, where soil can dry out quickly. Avoid mulching too heavily, as radishes need airflow around their leaves to prevent fungal issues. Check the soil daily during dry spells—wilting leaves signal it’s time to water again.
Thin Seedlings for Larger, Healthier Roots
When seedlings reach 2 inches tall, thin them to the desired spacing—2 inches apart for round varieties or 3 inches apart for longer types. Use clean scissors to snip unwanted seedlings at soil level, leaving the strongest, straightest plants. This reduces competition for nutrients and encourages faster, fuller root development.
Thinning might seem harsh, but it’s the key to avoiding tough, woody radishes. After thinning, water the remaining seedlings again to help them recover. You’ll notice within a few days that the kept plants perk up and grow more vigorously. This is your cue that the thinning worked—now, it’s just a matter of waiting for harvest.
Monitor and Harvest for Peak Flavor
Radishes mature quickly, so check the soil daily 2-3 weeks after planting. Gently brush aside the soil with your fingers to inspect root size—most varieties are ready when they reach 1-1.5 inches in diameter. Harvest on a dry day to prevent muddy roots, and pull them carefully by the leaves to avoid damaging the taproot.
Don’t let radishes linger in the ground past their prime—they’ll turn pungent and woody. If you miss the window, you can still eat them, but their flavor and texture will suffer. Store harvested radishes in the fridge for up to 2 weeks in a perforated bag to keep them crisp. With this method, you’ll enjoy fresh, homegrown radishes in record time.
Tips & tricks for planting radish seedlings
A few strategic adjustments can help you achieve that rapid harvest in just three weeks—here's what I've learned from years of growing radishes.
Soil Preparation is Non-Negotiable: In Step 1, when working your soil to a depth of 6 inches, focus on creating a loose, almost fluffy texture. I use a garden fork to break up compacted layers, which prevents the radish roots from struggling to penetrate. Adding compost along with the 1 tablespoon of 5-10-5 fertilizer per 4 square feet creates an ideal environment for quick root development. The key is achieving that "damp sponge" consistency—press your finger 1 inch deep to test moisture before planting.
Timing Your Watering Strategy: Radishes are particularly sensitive to moisture fluctuations during their rapid growth phase. After planting, water deeply but avoid creating puddles—this is critical for preventing rot. The 2-3 day watering schedule works best when you monitor the top 1 inch of soil daily during hot weather. I've found that watering in the early morning gives the soil time to absorb moisture before evaporation, which is especially important during those first 2-3 weeks when roots are establishing.
Thinning Technique That Makes All the Difference: When your seedlings reach 2 inches tall in Step 4, take your time with thinning. I use clean scissors to snip at soil level rather than pulling, which prevents disturbing the roots of neighboring plants. The spacing adjustment—2 inches for round varieties or 3 inches for longer types—might seem minor, but it dramatically affects root development. After thinning, give the remaining plants a drink of water to help them recover and establish stronger root systems.
Harvesting at the Perfect Moment: The 2-3 week window for harvest is deceptive—it can feel like a blur! To determine readiness, gently brush aside soil with your fingers to check root size. Most varieties should reach 1-1.5 inches in diameter, but different types have specific maturity times. I find that harvesting on a dry morning prevents muddy roots and makes cleaning easier. Pull carefully by the leaves to avoid damaging the taproot, which could compromise future growth if you're planning to succession plant.
Pro Tips for Planting Radish Seedlings
- A few strategic adjustments can help you achieve that rapid harvest in just three weeks—here's what I've learned from...
- Soil Preparation is Non-Negotiable: In Step 1, when working your soil to a depth of 6 inches, focus on creating a loo...
- Timing Your Watering Strategy: Radishes are particularly sensitive to moisture fluctuations during their rapid growth...
Frequently asked questions
Got questions about transplanting radish seedlings? You’re not alone—let’s tackle the most common ones to ensure your fast-growing roots thrive!
When is the best time to transplant radish seedlings?
Transplant seedlings when they’re 2–3 inches tall and have 2–3 true leaves, typically 2–3 weeks after sowing. Choose a cool day (ideally 50–70°F) to avoid stress. Early spring or late summer works best—radishes hate heat!
How long after transplanting will radishes be ready to harvest?
With proper care, you’ll harvest in just 3–4 weeks after transplanting! Check soil daily—small radishes (like ‘Cherry Belle’) are ready in 21–25 days, while larger varieties may take 30 days. Pull them when tops are 1–2 inches wide.
What if my seedlings look wilted after transplanting?
Wilted seedlings often mean transplant shock or overwatering. Water deeply before transplanting, then keep soil consistently moist (not soggy). If leaves droop, trim any damaged foliage and shade plants for a day to recover. Avoid transplanting in hot afternoons!
Can I plant radish seedlings directly in the ground instead of starting indoors?
Radishes are fast-germinating and thrive when sown directly. Skip seedlings entirely—just plant seeds ½ inch deep, 1 inch apart, and thin to 2–3 inches when they sprout. Direct sowing saves time and reduces transplant stress!
How do I protect radish seedlings from pests after transplanting?
Radishes attract flea beetles and cabbage worms. Use row covers or diatomaceous earth for beetles, and handpick worms early. Interplant with bush beans or lettuce to deter pests. Avoid over-fertilizing—too much nitrogen attracts bugs!
Wrapping up and next steps
Planting radish seedlings is a rewarding way to enjoy a quick, crisp harvest—perfect for beginners and busy gardeners alike! 🌱 With the right soil, spacing, and care, you’ll be feasting on fresh radishes in just three weeks.
Now that you’re armed with tips on transplanting, watering, and troubleshooting, it’s time to roll up your sleeves and get growing.
Start by picking a sunny spot in your garden or container and follow the steps above. Soon, you’ll be savoring the satisfaction of a homegrown harvest—one radish at a time! Happy planting! 🌟