Shrubs
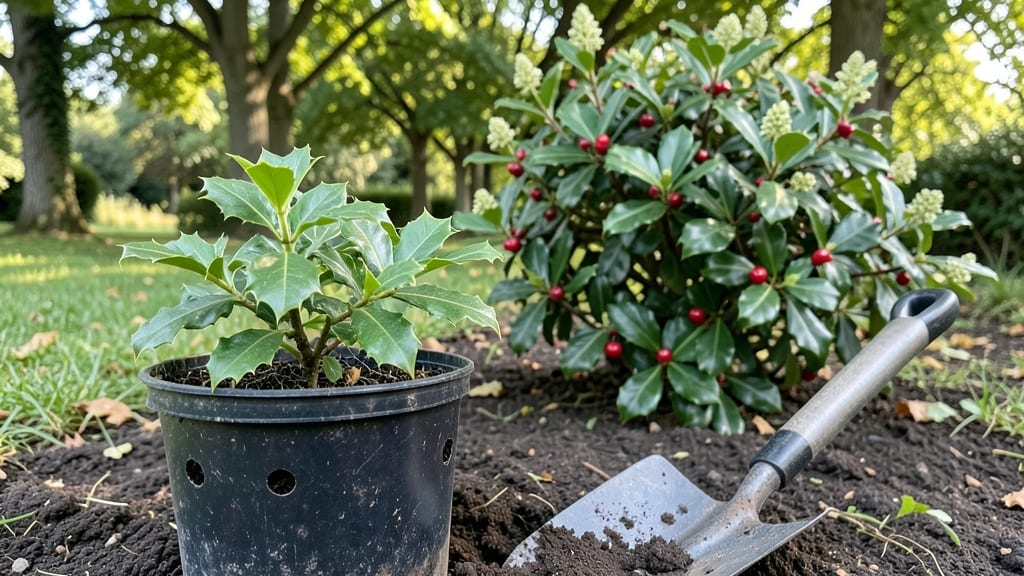
Planting holly bushes transforms bare patches into lush, year-round privacy screens faster than you’d expect. 🌿 I’ve watched my own holly hedges grow from scraggly saplings to impenetrable green walls in just three seasons—no fuss, no constant pruning, and the birds love the berries.
The key is picking the right variety for your climate and giving them the perfect start in the ground.
Start with male and female plants if you want berries, or just females if you only care about the glossy foliage. Most hollies thrive in full sun to partial shade, though southern varieties handle heat better than northern ones.
Amend heavy clay soil with compost—hollies hate soggy roots—and space them 6 to 10 feet apart for that dense, formal look. A little extra effort here means fewer headaches later.
Once planted, water deeply for the first two weeks to help roots establish, then taper off to 1 inch per week. Mulch with 2–3 inches of shredded bark to keep moisture in and weeds out—this single step cuts watering by half.
By year three, your holly will be taller than you are, with thick branches that block wind and prying eyes. The best part? They stay green even in winter.
For long-term health, fertilize once a year in early spring with a balanced 10-10-10—no need for fancy mixes. Prune lightly in late winter to shape, but avoid heavy cuts unless you’re rejuvenating an old bush.
Hollies reward patience with decades of carefree growth, making them the ultimate low-maintenance shrub. Ready to get started?
📚 In This Guide
- What you need
- Instructions
- Tips and common mistakes
- Wrapping up and next steps
What you need
- ● Holly bushes: 3–5 plants per 3-foot section of your desired privacy screen (adjust based on spacing—aim for 10–15 feet apart for mature size). Choose Ilex opaca (American holly) or other cold-hardy varieties for best results.
- ● Shovel or trowel: A round-point shovel (for digging holes) and a hand trowel (for delicate root adjustments).
- ● Measuring tape: To ensure proper spacing between plants.
- ● Compost or well-aged manure: 5–10 gallons per plant to enrich the soil.
- ● Mulch (pine straw, wood chips, or shredded bark): 2–3 inches to retain moisture and suppress weeds.
- ● Garden hose or watering can: With a gentle spray nozzle for post-planting hydration.
- ● Gloves: Heavy-duty work gloves to protect your hands from thorns and rough soil.
- ● Pruning shears: For trimming any damaged branches during planting.
- ● Soil test kit: To check pH levels (holly thrives in acidic soil, pH 5.0–6.0).
- ● Slow-release fertilizer: Balanced 10-10-10 or acidic fertilizer for a nutrient boost.
- ● Epsom salt: 1 tablespoon per plant for magnesium (great for holly health!).
- ● Plant stakes or markers: To label varieties and track growth.
- ● Drip irrigation system: For consistent moisture, especially in dry climates.
Step-by-Step instructions for planting holly bushes
Here’s how to establish a lush, low-maintenance evergreen screen that thrives for decades.
🪴 Step 1: Choose the Right Location and Dig Holes
Holly bushes love full sun to partial shade—at least 6 hours of sunlight daily—but they tolerate light shade in hot climates. Mark your planting spots 6-10 feet apart (closer for faster screening, wider for mature size). Use the shovel to dig holes twice as wide and just as deep as the root ball—this gives roots room to spread without crowding.
Loosen the soil at the bottom of each hole with your fingers or the shovel handle. Avoid compacting it—holly roots need air and space to establish. If your soil drains poorly, mix in 3-4 inches of coarse sand or compost to improve drainage. The goal is loose, well-aerated soil that won’t waterlog roots.
🌱 Step 2: Prepare the Bushes and Plant
Remove each holly from its container and gently tease apart the roots if they’re circling tightly—a common issue with nursery plants. Soak the root ball in water for 10-15 minutes before planting to revive any dried-out roots. This step is critical, especially if you’ve bought bare-root holly.
Place the bush in the hole so the top of the root ball sits level with the surrounding soil—burying too deep suffocates the plant, while planting too high stresses it. Fill the hole with native soil (no amendments needed unless you amended the hole), then tamp gently with your foot to eliminate air pockets. Water deeply to settle the soil around the roots.
💧 Step 3: Water and Mulch for Retention
Give each newly planted holly 1-2 gallons of water immediately after planting. Water slowly at the base to avoid disturbing the soil—holly roots are shallow and sensitive. Over the next 2-3 weeks, water deeply every 3-4 days until the soil is 4-6 inches deep and moist. This encourages deep root growth, which means stronger, drought-resistant bushes.
Spread the 3 inches of mulch over the soil surface, keeping it 6 inches away from the trunk to prevent rot. Use wood chips or pine straw—they retain moisture, regulate soil temperature, and suppress weeds. Refresh the mulch annually in late winter to maintain its benefits.
☀️ Step 4: Prune and Fertilize for Healthy Growth
Skip pruning the first year—let the holly focus on root establishment. In early spring of the second year, trim any dead, damaged, or crossing branches with clean, sharp pruners. Cut just above a bud or branch collar to encourage healthy regrowth. This is also the time to shape the bush if you’re aiming for a specific form, like a hedge.
Apply ½ cup of 10-10-10 fertilizer around the base of each bush in early spring and again in mid-summer. Water the area thoroughly after fertilizing to help nutrients reach the roots. Holly bushes are slow to respond to fertilizer, so don’t overdo it—too much nitrogen leads to weak, leggy growth. A light feeding keeps them strong without burning.
⏰ Step 5: Monitor and Maintain for Long-Term Success
Check soil moisture weekly during the first growing season—holly roots should stay evenly moist but not soggy. Once established (after 2-3 years), holly bushes tolerate drought conditions but still need deep watering every 2-3 weeks during dry spells. Yellowing leaves usually mean overwatering or poor drainage, while crispy edges signal underwatering or heat stress.
Prune lightly each year in late winter or early spring to maintain shape and encourage dense growth. Remove any suckers or water sprouts that appear at the base—they drain energy from the main plant. With minimal care, your holly screen will fill in beautifully in 3 years, providing year-round privacy and wildlife habitat.
Tips & tricks for perfect holly bush planting
Real talk: Planting holly bushes is easier than you think—but these tricks will help you avoid the most common mistakes and get that lush privacy screen growing strong in no time.
Soil Prep is Everything: In Step 1, when you're digging those holes, take an extra minute to break up any compacted soil at the bottom with your fingers or a garden fork. Holly roots need loose, airy soil to establish properly. If your soil feels dense or clay-heavy, mix in that 3-4 inches of coarse sand right at the bottom of the hole—this creates a perfect drainage layer that prevents waterlogging, which is the #1 reason holly bushes fail. Think of it like giving your plants a spa treatment before they even get planted!
The 10-15 Minute Soak Makes All the Difference: Don't skip the 10-15 minute water soak in Step 2—this is especially critical if you're planting bare-root holly. I've seen so many people rush this step and end up with plants that struggle to take hold. Fill a bucket with water, let the root ball soak completely, then give it a gentle squeeze to check—if water drips out, it's ready. This simple step revives any dried-out roots and helps the plant transition from container to garden with minimal stress.
Mulching Like a Pro: When you spread that 3 inches of mulch in Step 3, here's the secret: create a little "mulch volcano" around each plant, keeping it 6 inches away from the trunk. This creates a moisture reservoir that protects those shallow roots while keeping the trunk dry. I like to use wood chips because they break down slowly and improve soil structure over time. Plus, they look gorgeous! Just remember to refresh it annually—old mulch loses its effectiveness fast.
Fertilizer Timing is Critical: In Step 4, that ½ cup of 10-10-10 fertilizer should go around the dripline (the edge of the plant's canopy), not right against the trunk. Water it in immediately to help the nutrients reach those roots. And here's what nobody tells you—holly bushes actually prefer a little less fertilizer than most plants. Too much nitrogen creates weak, leggy growth that's prone to disease. Think quality over quantity with these slow-and-steady growers!
Pro Tips for Planting Holly Bushes
- Real talk: Planting holly bushes is easier than you think—but these tricks will help you avoid the most common mistak...
- Soil Prep is Everything: In Step 1, when you're digging those holes, take an extra minute to break up any compacted s...
- The 10-15 Minute Soak Makes All the Difference: Don't skip the 10-15 minute water soak in Step 2—this is especially c...
Frequently asked questions
Got questions about planting holly bushes? You’re not alone! Here are some of the most common queries—plus straightforward answers to help you grow a lush, low-maintenance privacy screen in no time.
When is the best time to plant holly bushes?
The ideal window is early spring or fall—when temperatures are mild (50–70°F) and soil isn’t frozen. Avoid extreme heat or cold, which can stress young plants. Pro tip: If planting in summer, water deeply daily for the first 2 weeks to help roots establish.
How far apart should I space holly bushes for a dense screen?
For a tight, fast-growing hedge, plant holly bushes 3–4 feet apart in rows spaced 4–5 feet apart. If you prefer a more open look (like a woodland edge), stretch spacing to 5–6 feet. Thinner spacing = quicker privacy, but pruning will be easier with a little extra room!
Are holly bushes toxic to pets or kids?
Yes! Holly berries and leaves contain saponins and methylxanthines, which can cause mild stomach upset if ingested. Keep bushes away from play areas, and train pets to avoid nibbling. Warning: Birds love the berries, so expect some seed dispersal—plant in areas where this won’t be an issue.
Can I plant holly bushes in full shade?
Most holly varieties (like Ilex opaca) thrive in partial shade (3–6 hours of sun daily), but they’ll grow slower in deep shade. For full-shade spots, choose dwarf or shade-tolerant types (e.g., ‘Dwarf Burford’ or ‘Blue Princess’). If possible, plant where they’ll get morning sun for best berry production.
Why aren’t my holly bushes growing? Troubleshooting tips.
Check these common culprits:
- Poor soil: Hollies love acidic, well-draining soil (pH 5.0–6.0). Amend clay soil with peat moss or compost.
- Overwatering: Roots rot in soggy soil. Water 1–1.5 inches per week (more in extreme heat).
- Nutrient deficiency: Yellow leaves? Try a slow-release fertilizer (like 10-10-10) in early spring.
- Pests: Spider mites or scale insects can stress bushes. Treat with neem oil or insecticidal soap if you spot webbing or sticky residue.
Still stumped? Snip a leaf and check for disease spots (fungal) or chewed edges (deer/rabbits).
Wrapping up and next steps
Planting holly bushes is a rewarding way to add year-round greenery and natural privacy to your yard with minimal effort!
With the right soil, spacing, and occasional care, you’ll enjoy a lush, evergreen screen in just three years—without the fuss. 🌿✨ Whether you’re a beginner or a seasoned gardener, these hardy shrubs are a fantastic, low-maintenance choice.
Now that you’re armed with the know-how, roll up your sleeves and get planting! Grab your gloves, pick your favorite holly variety, and watch your outdoor space transform into a serene, green oasis. Happy gardening!