Vegetables
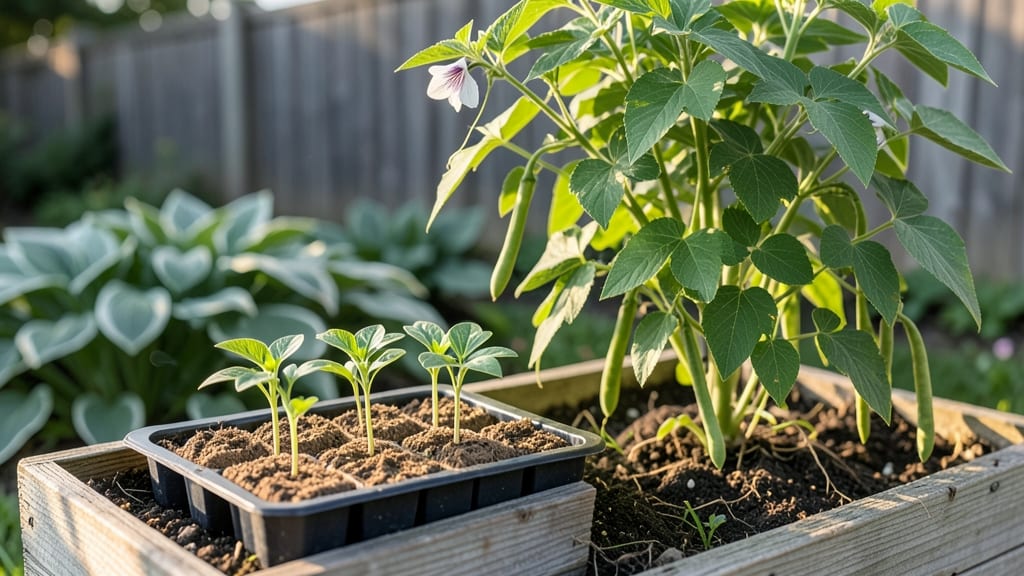
Planting butter beans when soil temperatures hit 60°F cuts germination time from weeks to days. 🌱 I learned this the hard way after watching seeds sit for two weeks before finally sprouting—until I started using black plastic mulch to warm the soil. The difference is night and day.
You’ll need a sunny spot with well-draining soil, seeds (like 'Limelight' or 'Fordhook'), and a way to warm the soil—whether it’s black plastic, row covers, or even a clear plastic bottle buried nearby.
Butter beans hate cold, so timing matters: wait until after the last frost when nights stay above 50°F.
Once planted, keep the soil moist but not soggy, and you’ll see tiny leaves breaking through the soil in 5-7 days. The plants grow fast after that, climbing or bush-style depending on the variety, and you’ll harvest tender pods in 60-70 days.
Works in containers too—just use a deep pot with good drainage. The key is that warm soil trick, which makes all the difference between a slow start and a thriving garden. Let’s get those seeds in the ground!
📚 In This Guide
- What you need
- Instructions
- Tips and common mistakes
- Wrapping up and next steps
What you need
- ● Butter bean seeds: 1–2 lbs (or about 50–100 seeds, depending on spacing goals). Choose Phaseolus lunatus varieties like ‘Henderson’ or ‘Dixie Cream’ for optimal results.
- ● Growing containers or garden bed: Containers: 5–7 gallon pots (or larger) with drainage holes, or a raised bed (at least 12" deep).
- ● Garden bed: A sunny spot (6+ hours of light daily) with loose, well-draining soil.
- ● Soil: A mix of 60% potting soil and 40% compost (or store-bought vegetable garden soil). Avoid heavy clay!
- ○ Black plastic mulch or row covers: 3–4 ft wide, enough to cover your planting area (optional but highly recommended for soil warming!).
- ● Watering can or hose with a gentle spray nozzle: For consistent moisture without disturbing seeds.
- ● Clear plastic sheeting: 4–6 mil thickness, large enough to drape over your planting area (e.g., 4’x8’ sheet for a standard bed).
- ● Bricks, rocks, or garden stakes: To secure the plastic and create a mini greenhouse effect.
- ○ Thermometer (optional but fun!): A soil thermometer to monitor warmth (aim for 70–90°F for fastest germination).
- ● Seedling heat mat: For indoor starts or early-season planting.
- ● Fertilizer: A balanced organic fertilizer (e.g., 5-5-5) or compost tea to boost growth after germination.
- ● Trellis or stakes: If growing pole varieties (butter beans can climb 6–10 ft!).
- ● Plant markers: To track varieties and spacing.
Step-by-Step instructions for planting butter beans with soil-warming tricks
Here's how to get those beans sprouting in record time using simple warmth hacks.
🌱 Step 1: Prepare the Planting Site with Warmth
Butter beans love warmth, so I always start by amending the soil with the 1 pound of compost and 1/2 pound of aged manure mixed into the top 6 inches of soil. This creates a cozy environment for roots to establish quickly. Use a garden fork to loosen the soil to a depth of 12 inches—beans need room to stretch their roots deep for moisture.
Here's the trick: if your spring soil is still cool, spread a black plastic mulch over the planting area 3-5 days before sowing. The plastic warms the soil by 10-15°F and speeds germination by 3-5 days. Just poke small holes in the plastic where you'll plant—this keeps the soil warm while protecting tender seeds from cold drafts.
💧 Step 2: Plant Seeds at the Right Depth and Spacing
Drop 4-5 seeds per hole at a depth of 1-1.5 inches—any deeper and they’ll struggle to push through. Space holes 4 inches apart in rows that are 18 inches apart. I like to plant them in a slight trench, then cover with soil and water gently. The key is keeping the soil moist but not soggy—beans hate waterlogged roots.
If your soil is still chilly, mix 1/4 cup of coffee grounds into each hole before planting. The grounds add warmth and nutrients, plus they deter pests. Water the seeds immediately after planting to settle the soil around them. You’ll see tiny sprouts in 5-7 days if the soil stays above 65°F—that’s your signal everything’s working.
☀️ Step 3: Use Row Covers for Extra Warmth and Protection
After planting, drape a lightweight row cover over the bed to trap heat and shield seedlings from wind. The cover acts like a mini greenhouse, keeping soil temps 5-10°F warmer than ambient. Secure the edges with soil or bricks to prevent drafts. You’ll notice the soil stays warmer to the touch even on cool mornings—that’s how you know it’s working.
Remove the cover once seedlings reach 2 inches tall and have 2-3 true leaves. This prevents them from getting too hot or leggy. If nights are still chilly, leave the cover on overnight for another 3-4 days until the soil warms up naturally. Butter beans thrive in 70-85°F soil, so aim to keep them in that range for the fastest growth.
🌿 Step 4: Maintain Warmth and Water Consistently
Water the plants deeply every 2-3 days, aiming for 1 inch of water per week. Use a soaker hose or drip irrigation to keep moisture even—beans hate wet leaves, which can spread disease. Mulch the soil with 2 inches of straw to retain warmth and suppress weeds. The mulch also keeps the soil surface cooler, which prevents crusting and helps young roots breathe.
Watch for yellowing leaves—this usually means the soil is too cold or too wet. If you see it, adjust your watering and check soil temp with a probe. Butter beans grow fastest when soil stays consistently warm, so a little extra effort here pays off with bigger yields in less time. You’ll know you’re on track when plants grow 1-2 inches per week and leaves stay deep green.
Tips & tricks for planting butter beans with soil-warming tricks
These simple tricks will help your butter beans sprout faster and grow stronger—no guesswork required.
Soil Temperature is Everything: That 65°F minimum soil temperature in Step 2 is non-negotiable. I learned this the hard way after planting too early—seeds just sat there for weeks. Use a soil thermometer to check before planting, especially in spring. If your soil is cooler than 65°F, the black plastic mulch trick from Step 1 is your best friend. That 10-15°F boost can make the difference between waiting weeks and seeing sprouts in 5-7 days.
Timing the Mulch Matters: Don't rush the 3-5 days of pre-planting mulching in Step 1. This isn't just about warming soil—it's about creating the perfect moisture balance. The mulch traps heat during the day while preventing moisture loss at night. I've seen soil temps jump from 55°F to 75°F with just this simple step. Pro tip: Remove the mulch right before planting to avoid disturbing the seeds when you poke holes.
Coffee Grounds Hack: The 1/4 cup of coffee grounds in each hole isn't just for warmth—it's a triple threat. The grounds improve soil structure, add nitrogen, and create a mild acidic environment that deters pests. Just make sure they're fully composted (no fresh grounds!) to avoid burning tender roots. I keep a jar of used coffee grounds in my freezer and mix them into the planting holes when soil temps are still borderline.
Row Cover Secrets: When using the row cover in Step 3, leave it slightly loose on one side to create a venting flap. This prevents overheating while still trapping warmth. I also like to remove the cover for a few hours during the warmest part of the day once seedlings are established—this helps them toughen up. And remember, those 2 inches tall with 2-3 true leaves are your cues to start weaning them from the cover gradually over 3-4 days.
Pro Tips for Planting Butter Beans
- These simple tricks will help your butter beans sprout faster and grow stronger—no guesswork required.
- Soil Temperature is Everything: That 65°F minimum soil temperature in Step 2 is non-negotiable. I learned this the ha...
- Timing the Mulch Matters: Don't rush the 3-5 days of pre-planting mulching in Step 1. This isn't just about warming s...
Frequently asked questions
Got questions about planting butter beans?
You’re not alone! Here are answers to the most common queries—from timing to troubleshooting—so you can grow a thriving crop with confidence.
When is the best time to plant butter beans?
Plant butter beans after the last frost when soil temperatures reach at least 60°F (15°C). In warm climates, sow seeds in early spring; in cooler regions, wait until late spring or early summer. They thrive in heat but hate cold, so avoid planting too early!
Can I plant butter beans in containers?
Butter beans grow well in 5-gallon containers or larger, as long as they have 6–8 inches of deep soil and proper drainage. Use a lightweight potting mix and place pots in full sun. Just ensure vines have room to climb or sprawl—trellises work great for vertical growth!
Why aren’t my butter bean seeds germinating?
Slow germination often stems from cold soil or poor moisture. Try these fixes:
- Warm the soil: Use black plastic mulch or a seedling heat mat.
- Soak seeds overnight before planting to kickstart growth.
- Ensure soil stays moist but not soggy—consistent watering is key.
Do butter beans need trellising?
Not required, but trellising saves space and improves air circulation, reducing disease risk. Use a 4–6 foot tall trellis or let vines sprawl on the ground if space allows. Bush varieties (like ‘Henderson’) stay compact, while pole types (like ‘Contender’) need support for optimal growth.
How do I protect butter beans from pests?
Common pests like bean beetles, aphids, and slugs can damage plants. Try these organic solutions:
- Row covers to block flying insects early in the season.
- Handpick slugs at night (they’re most active then!).
- Plant marigolds or nasturtiums nearby to repel pests naturally.
- Use neem oil as a spray for aphids or beetles.
Wrapping up and next steps
Growing butter beans doesn’t have to be a slow process—with the right soil-warming tricks, you’ll have lush vines and tasty pods in no time! 🌱 Whether you’re using black plastic mulch, compost piles, or row covers, these methods speed up germination and boost yields.
Now that you’re armed with the best techniques, why not try planting a small batch this weekend? Start with just a few seeds, experiment with warmth, and watch your garden thrive.
Once your butter beans take off, consider saving seeds or sharing your harvest with neighbors—spreading the joy (and the beans!) is half the fun. Happy planting! 🌟