Watering
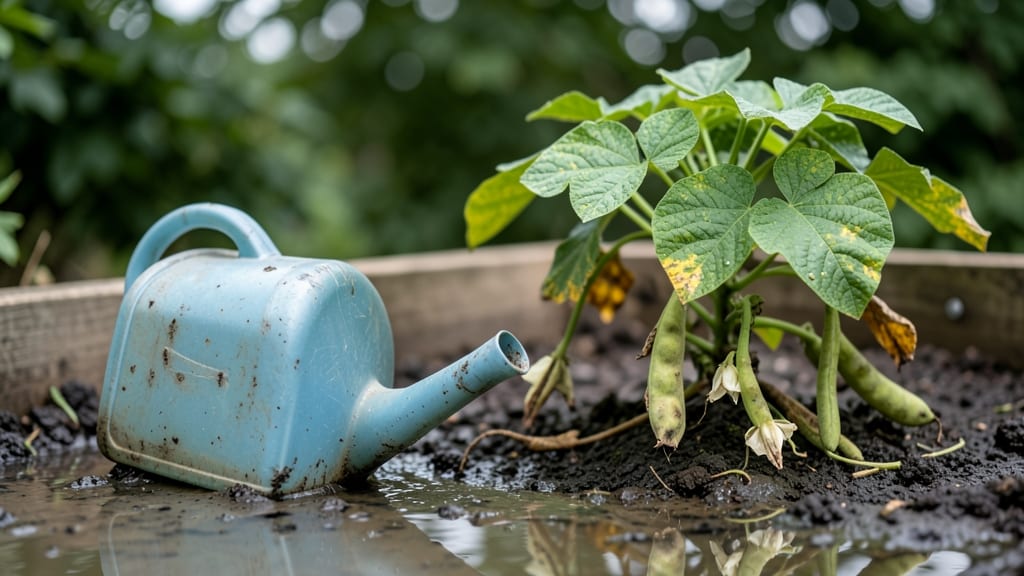
Overwatered bean plants can look like they’re drowning—yellow leaves, mushy stems, and roots that smell like rot. 🌱 I’ve pulled more than a few soggy bean vines from the ground, and the good news is they can bounce back with the right moves.
The key is acting fast before root rot takes over completely.
First, stop watering entirely for 3-5 days to let the soil dry out. Then, gently loosen compacted soil around the roots to help air circulate. If the roots look black or squishy, trim those off with clean scissors—healthy roots should be firm and white or light tan.
Once you’ve got the watering under control, switch to a container with drainage holes if your beans are in pots. For in-ground plants, mix in compost or perlite to improve drainage.
Within a week, you’ll see new growth as the roots recover—just don’t go back to watering on a schedule until the soil stays dry for a full day after watering.
To keep this from happening again, water only when the top 1-2 inches of soil feel dry. Beans are tough—once they’re back on track, they’ll reward you with bushels of beans instead of sad, wilted vines. Let’s get those plants thriving again!
Root Causes of Too Much Water
When your bean plants start looking sad—yellowing leaves, drooping vines, or even moldy soil—it’s often a sign they’re getting too much love (in the form of water). But why does this happen?
Overwatering isn’t just about pouring too much H₂O; it’s a mix of environmental factors, soil conditions, and even human habits. Let’s break down the most common culprits so you can fix the problem at its source.
Beans need well-draining soil to thrive, but if water can’t escape easily, roots suffocate in soggy conditions. Here’s why this happens:
- Compacted or clay-heavy soil: Clay holds water like a sponge, leaving roots starved for oxygen. If your garden soil feels dense when dry, it’s a red flag.
- Small or clogged pots: Without drainage holes, water pools at the bottom, creating a breeding ground for Pythium (a fungus that rots roots). Even "self-watering" containers can trap excess moisture.
- Mulch piled too high: A thick mulch layer (over 2–3 inches) can smother soil and block evaporation, keeping the root zone damp longer than beans like.
Pro Tip: 💡 Test your soil’s drainage by filling a pot with water, then timing how long it takes to drain. If it sits for more than 30 minutes, amend with perlite or sand.
Beans hate "wet-dry-wet" cycles—skipping watering one day and drowning them the next throws their roots into chaos. Here’s how inconsistent watering backfires:
- Fluctuating moisture levels: Roots grow toward water, but if the soil dries out completely before the next watering, they’ll stretch too far, weakening the plant’s structure.
- Surface-level watering: Pouring water only on the top inch of soil (like from a hose or sprinkler) encourages shallow roots. Beans need deep hydration to reach their full potential.
- Ignoring weather changes: Heavy rain followed by a watering session doubles the moisture, while hot days increase evaporation. Adjust your schedule like a meteorologist!
Pro Tip: ⏰ Use your finger to check soil moisture 1–2 inches down. If it’s damp, wait. If it’s dry, water deeply until it runs out the drainage holes.
Beans are tropical plants at heart, but extreme humidity or cold snaps can make them more vulnerable to overwatering. Here’s the science:
- High humidity slows evaporation: In muggy conditions (like greenhouses or rainy seasons), soil stays wet longer, even if you’re not adding extra water. Fungal diseases like downy mildew thrive in these conditions.
- Cold soil reduces root activity: When temperatures drop below 60°F (15°C), bean roots grow slower and can’t absorb excess water efficiently, leading to waterlogged stress.
- Wind or poor airflow: Stagnant air around plants traps moisture, mimicking the effects of overwatering. This is why container beans often suffer more than in-ground plants.
Pro Tip: 🌡️ Move potted beans to a shadier, breezier spot during heatwaves or after rain. A small fan on low can improve airflow without stressing the plants.
Not all soil is created equal—and beans are picky about their growing medium. Common mistakes include:
- Too much organic matter: While compost is great, too much can create a dense, water-retentive environment. Aim for a mix of 60% inorganic (sand, perlite) and 40% organic.
- No amendments for clay soil: Native clay soil can hold 40% more water than sandy soil. Amend with gypsum or coarse sand to improve aeration.
- Using potting mix without perlite/vermiculite: Pre-mixed potting soil often lacks the grit beans need to prevent compaction. DIY a blend with coconut coir, compost, and perlite.
Pro Tip: ✨ For containers, use a 50-50 mix of potting soil and coarse sand or perlite. This ensures water drains but nutrients stay available.
Now that you know the root causes, you’re one step closer to reviving your beans. Next up: How to spot the damage and 3 easy fixes to bring your plants back to life.
Reviving Soggy Bean Plants Fast
Now that you know the signs and causes of overwatered bean plants, let’s roll up our sleeves and get them back on track! The good news? With the right steps, your beans can bounce back—sometimes even stronger than before.
Below, we’ll tackle each issue head-on with practical fixes and prevention tips to keep your plants thriving.
Cause: Too much water suffocates roots, blocking oxygen and nutrients. Solution:
- Stop watering immediately—let the soil dry out completely before watering again.
- Repot if needed—if roots are rotting (smelly, mushy), trim the damaged parts with clean scissors and transplant into fresh, well-draining soil.
- Boost airflow—space plants wider or prune nearby foliage to improve circulation.
Prevention Tip: 💡 Use your finger to check soil moisture—water only when the top 1–2 inches feel dry.
Cause: Overwatering weakens stems, and roots can’t support the plant. Solution:
- Prop up stems—gently tie drooping vines to a trellis or stake to prevent breakage.
- Adjust watering habits—switch to a drip irrigation system or water deeply but infrequently (every 3–4 days, depending on climate).
- Fertilize lightly—add a balanced, water-soluble fertilizer (like 10-10-10) to revive weakened roots.
Pro Tip: 🌡️ Morning watering reduces evaporation and fungal risks—stick to early AM sessions.
Cause: Waterlogged soil creates anaerobic conditions, inviting rot and bacteria. Solution:
- Drain excess water—place pots in saucers and empty them after 10–15 minutes.
- Improve drainage—add perlite or coarse sand to heavy soils, or drill holes in containers if they’re too dense.
- Fungal treatment—sprinkle baking soda (1 tsp per gallon of water) or neem oil on roots to fight pathogens.
Prevention Tip: ✨ Elevate pots on feet or use raised beds to prevent water pooling.
Cause: Overwatering stresses plants, diverting energy from blooms to survival. Solution: 1. Reduce water frequency—let soil dry between waterings (aim for 1 inch of moisture per week).
- Encourage blooms—add phosphorus-rich fertilizer (like bone meal) to promote flowering.
- Prune excess foliage—remove yellow leaves to redirect energy to flowers and pods.
Grower Hack: 🎯 Harvest pods regularly to stimulate more production!
Cause: Heavy, wet soil crushes roots, cutting off oxygen. Solution:
- Loosen soil—gently fork around roots to break up compacted areas.
- Mulch lightly—use straw or wood chips (1–2 inches) to retain moisture without suffocating roots.
- Test soil pH—beans prefer slightly acidic soil (6.0–7.0); amend with lime or sulfur if needed.
Prevention Tip: 🔥 Avoid walking on garden beds—compacted paths = compacted roots!
If your plants are beyond saving, don’t panic! Use the healthy stems to propagate new plants:
- Cut healthy vines at a 45° angle.
- Plant in fresh, well-draining soil.
- Keep moist (not soggy!) and provide shade until roots establish.
Remember: Patience is key—revival takes time, but your beans will thank you with a bountiful harvest! 🌱💚
Frequently asked questions
How do I know if my bean plants are truly overwatered?
Look for yellowing leaves (especially lower ones), mushy stems that feel soft when pressed, and soil that smells sour or rotten. Healthy roots should be firm and white, while overwatered roots turn black and mushy. If leaves wilt despite damp soil, that’s a classic overwatering sign.
Can I save my beans if the roots are already rotting?
Yes, but act fast! Trim away the black, mushy roots with clean scissors, then repot in fresh, well-draining soil. Reduce watering immediately and place the plant in bright, indirect light. Within a week, new roots should start growing if the stems are still healthy.
What’s the best way to fix compacted soil around my beans?
Gently loosen the soil around the roots with a fork or your hands to improve airflow. Mix in perlite or coarse sand (1 part to 3 parts soil) to break up compaction. For heavy clay soil, add compost or aged manure to help it drain better without suffocating roots.
How often should I water beans after they’ve been overwatered?
Wait until the top 1-2 inches of soil feel completely dry before watering again. After recovery, aim for deep but infrequent watering—about 1 inch per week, adjusting for rain or heat. Always water at the base, not the leaves, to prevent fungal issues.
Will overwatered beans still produce pods?
Possibly, but recovery depends on how severe the damage is. If roots are still salvageable, new growth (and pods) can form within 2-3 weeks. Focus on reviving the plant first—healthy roots are key to future harvests. Prune any yellow leaves to redirect energy to new blooms.