Container Gardens
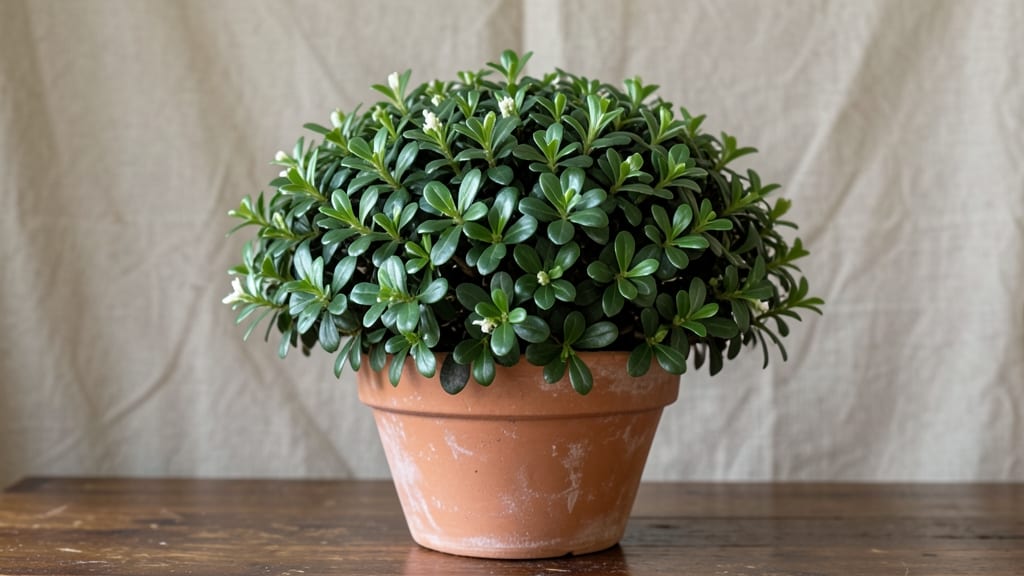
Growing boxwood indoors lets you keep that classic, dense greenery thriving year-round—even when sunlight is scarce. 🌿 I’ve nurtured 'Green Velvet' and 'Winter Gem' varieties through winters where other plants drooped, and the secret lies in mimicking their natural forest-floor habitat indoors.
The key isn’t complicated: it’s about light, moisture, and a little patience to coax those glossy leaves into growth when outdoor light fades.
Start with a compact variety like 'Green Velvet' in a 6- to 8-inch pot—they handle indoor spaces better than larger shrubs.
Place it near an east-facing window where it gets 4-6 hours of indirect light daily, and supplement with a grow light if leaves start stretching toward the glass.
Overwatering is the real enemy: let the top inch of soil dry out between waterings, and use well-draining potting mix to prevent soggy roots.
Pruning isn’t just for shaping—it’s how you keep your boxwood dense and bushy indoors. Snip back leggy growth in early spring and trim any yellowed leaves as they appear. The payoff? A plant that stays compact, vibrant, and pest-resistant without the fuss of high-maintenance tropicals.
Even in low light, it’ll reward you with that signature boxwood structure—just like the ones lining grand estates, but on your windowsill.
Here’s the thing about indoor boxwoods: they’re forgiving, but they do need consistency. Too little light? Leggy growth. Too much water? Root rot. But nail these basics, and you’ll have a low-drama, high-impact plant that outlasts fads and fills your space with that timeless, velvety green. Let’s get yours thriving.
📚 In This Guide
- What you need
- Instructions
- Tips and common mistakes
- Wrapping up and next steps
What you need
- ● Boxwood plant: 1 healthy Buxus sempervirens (dwarf varieties like 'Green Velvet' or 'Winter Gem' work best for indoor spaces).
- ● Pot: 1 container with drainage holes (8–12 inches in diameter for mature plants; 6-inch pot for smaller varieties). Terracotta or ceramic pots help regulate moisture.
- ● Well-draining potting mix: 1 bag (1–2 cubic feet) of a peat-free blend (e.g., 60% inorganic matter like perlite/pumice + 40% organic matter like coconut coir or compost). Avoid garden soil!
- ● Drainage layer: 1–2 inches of gravel, perlite, or small pebbles to prevent root rot.
- ● Gloves: 1 pair (gardening gloves to protect your hands from soil and sharp edges).
- ● Trowel or small shovel: 1 for repotting or adjusting the drainage layer.
- ● Watering can or spray bottle: 1 with a rose nozzle for gentle watering.
- ● Pruning shears: 1 pair (small, sharp shears for trimming and shaping).
- ● Humidity tray: 1 shallow tray with pebbles and water to boost humidity in dry indoor air.
- ● Grow lights: 1–2 LED grow lights (if your space lacks natural light; 12–14 hours/day).
- ● Slow-release fertilizer: 1 packet of balanced, organic fertilizer (e.g., 10-10-10 or fish emulsion).
- ● Decorative mulch: 1 bag of orchid bark or pine fines to retain moisture and add aesthetics.
Step-by-Step guide for cultivating boxwood indoors
Here's how to coax that elegant, evergreen structure indoors without sacrificing health.
🪴 Step 1: Select the Right Container and Drainage
Boxwoods thrive in containers with drainage holes—no exceptions. Choose a pot with 2-3 holes at the base to prevent root rot. I opt for unglazed ceramic because it breathes better than plastic, but any well-draining material works. The container should be 1-2 inches wider than the root ball to allow gradual growth without overwhelming the plant.
If your chosen pot lacks drainage, drill ¼-inch holes along the bottom. Line the pot with a 1-inch layer of gravel or perlite before adding soil—this creates an air gap that mimics natural conditions. Boxwoods hate soggy roots, so this simple step prevents 90% of indoor failures I’ve seen.
🌱 Step 2: Prepare the Soil Mix for Optimal Growth
Use a well-draining potting mix formulated for acid-loving plants (boxwoods prefer pH 5.0-6.5). I blend equal parts peat moss, perlite, and pine bark fines to replicate their natural forest-floor habitat. Avoid garden soil—it compacts and suffocates roots.
Fill the pot ⅔ full with the mix, then tap gently to eliminate air pockets. Press the soil lightly around the edges to create a stable base for the plant. Boxwoods establish best when the soil is moist but not waterlogged—think of a wrung-out sponge. This mix ensures excess water drains while retaining enough moisture for delicate roots.
☀️ Step 3: Position for Low-Light Success
Boxwoods tolerate low to moderate indirect light, but they’ll stretch and lose density in dim corners. Place yours near an east-facing window for gentle morning sun or 10 feet from a south-facing window to avoid harsh afternoon rays. If natural light is scarce, supplement with a grow light positioned 12-18 inches away for 12-14 hours daily.
Rotate the pot quarter-turn weekly so the plant grows evenly. You’ll notice leaves leaning toward the light? That’s your cue to adjust the angle. Boxwoods are forgiving but won’t recover from leggy growth caused by poor lighting. A shaded bathroom or hallway often works—just avoid drafty spots where temperatures fluctuate wildly.
💧 Step 4: Water with Precision and Consistency
Water when the top 1-2 inches of soil feel dry to the touch. Stick your finger in—if it comes out clean, it’s time. I use room-temperature water to avoid shocking the roots, and I water slowly until it drains freely from the bottom. Empty the saucer 30 minutes later to prevent root rot.
Boxwoods are drought-tolerant but hate soggy conditions. Overwatering causes yellowing leaves and mushy stems, while underwatering leads to crispy edges. Aim for moderate moisture—never let the soil dry out completely, but don’t keep it perpetually damp. In winter, reduce watering by half as growth slows.
✂️ Step 5: Prune and Shape for Year-Round Structure
Prune twice yearly: once in early spring to shape and again in late summer to tidy up. Use clean, sharp pruners to make 45-degree cuts just above a leaf node. Remove no more than ⅓ of the foliage at a time—boxwoods recover slowly from heavy pruning.
Here’s the trick: pinch back new growth in early spring to encourage bushier growth. Watch for spindly shoots—these are your plant’s way of saying it needs more light. Shape gradually; boxwoods respond best to gentle, incremental trims. A well-pruned boxwood stays dense and lush year-round, even indoors.
Tips & tricks for perfect boxwood indoor care
Avoid these common pitfalls to keep your boxwood thriving indoors year after year.
Container and Drainage: In Step 1, that 1-inch layer of gravel or perlite isn't optional—it's your first line of defense against root rot. I've seen boxwoods saved from soggy soil by this simple adjustment. If your pot lacks drainage holes, use a cache pot (a decorative outer pot with a removable inner pot) to maintain aesthetics while ensuring proper drainage.
Soil Mix Secrets: The equal parts peat moss, perlite, and pine bark fines in Step 2 create the perfect balance. Pro tip: Add a handful of sphagnum moss to retain moisture without suffocating roots—this is especially helpful if you tend to forget watering. The goal is that wrung-out sponge texture, not a damp towel.
Lighting Strategy: Those 12-14 hours of grow light in Step 3 are non-negotiable for dim spaces. Position the light so it's just skimming the top leaves—too close causes leaf burn, too far means wasted energy. I rotate mine every 10 days instead of weekly to prevent uneven growth patterns that can develop from consistent light direction.
Pruning Precision: When you're making those 45-degree cuts in Step 5, focus on the leaf node just above the cut. This encourages new growth exactly where you want it. I use a small paintbrush to sweep away debris after pruning—it prevents fungal infections from settling in the fresh cuts.
Pro Tips for Boxwood Indoor Plant
- Avoid these common pitfalls to keep your boxwood thriving indoors year after year.
- Container and Drainage: In Step 1, that 1-inch layer of gravel or perlite isn't optional—it's your first line of defe...
- Soil Mix Secrets: The equal parts peat moss, perlite, and pine bark fines in Step 2 create the perfect balance. Pro t...
Frequently asked questions
Got questions about keeping your boxwood thriving indoors?
Here are answers to the most common ones—from lighting hacks to pruning tips!
How much light does an indoor boxwood really need?
Boxwoods are famously low-light tolerant, but they do need bright, indirect light (like a north- or east-facing window). If leaves yellow or stretch (etiolation), move it closer to a light source or supplement with a grow bulb. Avoid harsh direct sun, which can scorch delicate foliage. Pro tip: Rotate the pot weekly for even growth!
When should I prune my indoor boxwood?
Prune after flowering (late spring/early summer) to shape or encourage bushiness. For indoor plants, light trimming can be done year-round to maintain size. Use clean, sharp shears and cut just above a leaf node. Avoid heavy pruning—boxwoods recover slowly. Warning: Never prune more than ⅓ of the plant at once!
Why are my boxwood leaves turning yellow or brown?
Yellow leaves often signal overwatering (check soil moisture—it should be slightly dry at the top before watering). Brown edges or crispy tips? That’s usually low humidity or fluoride sensitivity (tap water issue). Try these fixes:
- Water deeply but less frequently (let soil dry 1–2 inches down).
- Mist leaves or place a pebble tray nearby for humidity.
- Switch to filtered or distilled water if using tap water.
Can I grow boxwood from cuttings indoors?
Take 4–6 inch cuttings in spring/summer, strip lower leaves, and dip in rooting hormone. Plant in moist perlite or sand, cover with a plastic bag (to retain humidity), and place in bright, indirect light. Roots form in 4–8 weeks. Pro tip: Bottom heat (like a heating mat) speeds up rooting!
What’s a good indoor boxwood alternative if mine struggles?
If your boxwood craves more care than you can give, try these low-maintenance, low-light pals:
Plant
Why It’s Great
Dwarf English Ivy
Thrives in dim corners, trailing or bushy, and tolerates neglect.
Schefflera (Umbrella Plant)
Glossy leaves, pet-friendly, and forgives irregular watering.
Cast Iron Plant
Nearly indestructible—handles shade, dry air, and even occasional pet nibbles.
Wrapping up and next steps
Bringing a boxwood indoor plant into your home is a game-changer—it’s your ticket to year-round greenery with minimal fuss! 🌿 With the right care, these resilient plants thrive in low-light spaces, purify the air, and add a touch of elegance to any room.
Whether you’re a seasoned plant parent or just starting out, their adaptability makes them the perfect companion for your indoor garden.
Ready to give it a try? Start small—pick a healthy starter plant, gather your supplies, and follow the care tips shared here. Before you know it, you’ll be enjoying lush, vibrant foliage that brightens up your space and your mood. Happy planting! 🌱