Pruning
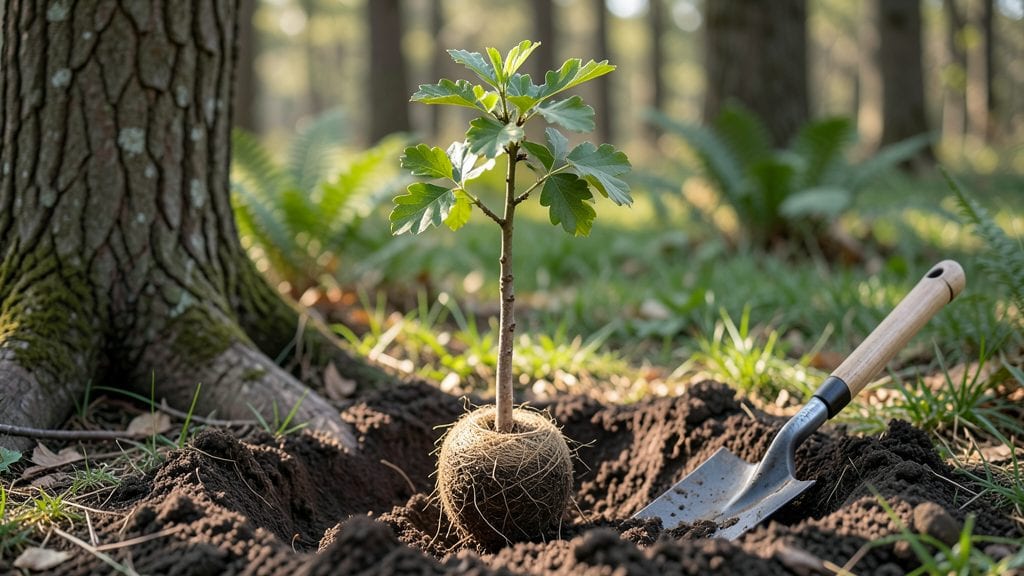
Here are some essential tree planting tips that’ll help you turn struggling saplings into sturdy giants—starting with these three techniques I’ve used to make the difference between flops and flourishing giants. 🌳 the first few weeks—especially the soil, water, and support.
I’ve learned the hard way that skipping these steps means years of fighting weak growth or even losing the tree entirely.
You’ll need the right tools—a sharp spade, a sturdy post for support, and organic mulch to lock in moisture. The hole should be twice as wide as the root ball but no deeper, because burying the trunk too much suffocates it.
Most people overthink the depth, but the real secret is loosening the soil around the edges so roots spread outward naturally. A single afternoon of prep work saves years of regret.
After planting, the first 12 months are critical—water deeply once a week (unless it rains) and keep the soil moist but never soggy. A 3-inch layer of mulch around the base blocks weeds and retains moisture, while a simple wooden stake prevents wind damage.
By next spring, you’ll see new shoots signaling strong root growth, and the tree will start looking like it belongs there forever.
These techniques work for any climate, though timing matters—spring or fall planting gives roots time to establish before extreme heat or cold. The biggest mistake? Ignoring the root flare (where the trunk meets the roots)—burying it too deep is a silent killer.
With these steps, your tree won’t just survive; it’ll become the centerpiece of your landscape for generations.
📚 In This Guide
- What you need
- Instructions
- Tips and common mistakes
- Wrapping up and next steps
What you need
- ● Tree sapling – Choose a healthy, native species (1–3 years old, 2–6 ft tall). Pro tip: 💡 Check roots for tangles or circling—gently loosen them before planting!
- ● Shovel or spade – A round-point shovel (18–24" wide) for digging or a digging spade for precision.
- ● Garden gloves – Heavy-duty, waterproof gloves to protect your hands from thorns, dirt, and blisters.
- ● Watering can or hose – A 5-gallon watering can with a rose attachment or a soaker hose for deep hydration.
- ● Mulch – 3–4 inches of organic mulch (wood chips, shredded bark, or straw) to retain moisture and suppress weeds.
- ○ Staking supplies (optional but helpful) – 2–3 wooden stakes (4–6 ft tall) + soft tree ties (not wire!) for young, top-heavy trees.
- ● Site assessment – Pick a spot with 6+ hours of sunlight (varies by tree species), 6+ feet of clearance for mature growth, and well-draining soil.
- ○ Soil test (optional but recommended) – Check pH and nutrient levels (ideal: 6.0–7.0). Amend with compost if soil is clay-heavy or sandy.
- ● Weather check – Plant on a cool, cloudy day (avoid extreme heat or frost). Pro tip: ✨ Water the root ball 1–2 hours before planting to reduce transplant shock!
Step-by-Step tree planting guide for strong, healthy growth
Here’s how I’ve planted dozens of trees—these techniques ensure roots establish fast and plants thrive for decades.
🌱 Step 1: Dig the Right Hole for Fast Root Spread
Start by digging a hole twice as wide as the tree’s root ball but no deeper—this encourages roots to spread horizontally where soil is loose and nutrient-rich. I use a shovel to loosen the sides of the hole, breaking up any compacted soil with my hands. The wider the hole, the faster roots can explore and anchor the tree.
Step back and check the depth—it should sit 1-2 inches higher than the surrounding ground. This prevents water from pooling around the trunk. If your tree comes in a container, gently squeeze the sides to loosen the root ball before removing it from the pot.
💧 Step 2: Prepare the Soil for Optimal Root Growth
Mix the native soil you removed with 1/3 compost (or the organic matter you’ve gathered) to improve drainage and fertility. Avoid amending with heavy clay or sand unless your soil test confirms a need—overworking the soil can create a barrier that roots won’t penetrate. I like to add a handful of slow-release fertilizer to the bottom of the hole for an extra nutrient boost.
Fill the hole halfway with this amended soil, then tap the sides gently to eliminate air pockets. This ensures roots make immediate contact with fertile soil rather than settling into gaps. Water the hole deeply to help the soil settle before placing the tree.
☀️ Step 3: Position and Backfill for Stability
Place the tree in the hole so the top of the root ball sits level with the surrounding soil—never bury the trunk too deep, or it’ll suffocate. I use a level to double-check, adjusting with small shovelfuls of soil as needed. Once positioned, fill the hole with the remaining amended soil, tamping it down lightly in 3-inch layers to eliminate air pockets.
Create a watering basin by mounding soil outward from the trunk to direct water away from the base. This prevents erosion and root rot. Water the tree deeply until the soil is saturated 12 inches down, then add 3-4 inches of mulch (like wood chips) in a 3-inch-wide ring around the base—never touch the trunk.
⏰ Step 4: Water and Protect for the First Critical Months
Water the tree every 2-3 days for the first month, soaking the soil to 12-18 inches deep each time. You’ll know it’s enough when water runs out the drainage holes if you’ve planted in a container, or when the soil feels damp 6 inches down. Overwatering now can drown roots, so let the top inch dry between waterings after the first month.
Stake only if necessary—young trees in windy areas may need temporary support. Use soft ties (like fabric strips) to avoid girdling the trunk. After planting, avoid heavy foot traffic around the area for at least 6 weeks to let roots establish without disturbance.
Tips & tricks for perfect tree planting
Planting a tree that thrives for decades starts with these simple but game-changing techniques that most people miss.
Root Ball Loosening: In Step 1, when you remove your tree from its container, don't just pull it out—gently squeeze and massage the sides of the root ball to loosen compacted roots. I've seen roots grow in circles when this step is skipped, which strangles growth. This extra 30 seconds prevents future root girdling that can kill trees over time.
Soil Mixing Secret: The 1/3 compost ratio in Step 2 is perfect, but here's what nobody tells you: mix the compost thoroughly with the native soil, not just sprinkle it in. I use a garden fork to blend them until it looks like a uniform brown. This ensures even distribution of nutrients where roots will grow most.
Watering Depth Check: When you're watering to saturate 12 inches down in Step 4, don't guess—use a metal rod or long screwdriver to check moisture levels. I push it in until I hit resistance, then pull it out and check the soil clinging to it. This simple test prevents both underwatering and drowning your new tree.
Mulch Placement: That 3-4 inch mulch ring in Step 3 is crucial, but here's the part that trips people up: keep it 3 inches away from the trunk. Too close causes rot, too far misses protecting the roots. I use a flat rock to create a small gap between mulch and trunk for airflow while still covering the soil.
Pro Tips for Tree Planting Tips
- Planting a tree that thrives for decades starts with these simple but game-changing techniques that most people miss.
- Root Ball Loosening: In Step 1, when you remove your tree from its container, don't just pull it out—gently squeeze and massage the sides of the root ball to loosen compacted roots.
- Soil Mixing Secret: The 1/3 compost ratio in Step 2 is perfect, but here's what nobody tells you: mix the compost thoroughly with the native soil, not just sprinkle it in.
Frequently asked questions
Got questions about planting trees like a pro? Here are some of the most common concerns—plus straightforward answers to help you grow with confidence!
What’s the best time of year to plant a tree?
Spring and fall are your golden windows! Plant in early spring (before bud break) or late fall (6-8 weeks before frost). Avoid summer heat or winter cold—roots need time to establish without stress. Pro tip: If planting in spring, water deeply before the first frost hits!
How often should I water a newly planted tree?
Water deeply 2-3 times per week for the first year, soaking the root ball (1-1.5 inches of soil). After that, taper to once a week unless it’s unusually dry. Watch for: Wilting leaves, cracked soil, or a dry mulch layer—these signal it’s time to hydrate!
Can I plant a tree in a small yard or container?
Opt for dwarf or columnar varieties (like Japanese maples or ‘Green Giant’ arborvitae) or use large containers (3+ feet wide) with drainage. Just ensure the pot gets full sun and you’re ready to repot every 2-3 years as roots grow.
My tree’s leaves are yellowing—what went wrong?
Yellow leaves often mean overwatering, underwatering, or poor drainage. Check the soil: If it’s soggy, improve drainage with compost. If dry, water more consistently. Fungal issues? Prune affected branches and avoid wetting foliage. Pro tip: Mulch 2-3 inches deep (but keep it away from the trunk) to retain moisture!
Do I need to fertilize my new tree?
Not right away! New trees often have enough nutrients in their root ball. Wait 6-12 months before adding fertilizer (use a slow-release, balanced formula like 10-10-10). Over-fertilizing can burn roots—less is more!
Wrapping up and next steps
Planting trees is more than just a green thumbs-up—it’s an investment in our planet’s future! 🌱 By choosing the right species, preparing the soil, and giving your tree the love it needs, you’re setting the stage for long-term growth and beauty.
Whether you’re a gardening pro or a beginner, every tree you plant makes a difference.
Ready to take action? Pick a spot, grab your tools, and start digging! Share your progress with fellow green thumbs or tag us in your tree-planting adventures—let’s grow together! 🌳✨