Trees
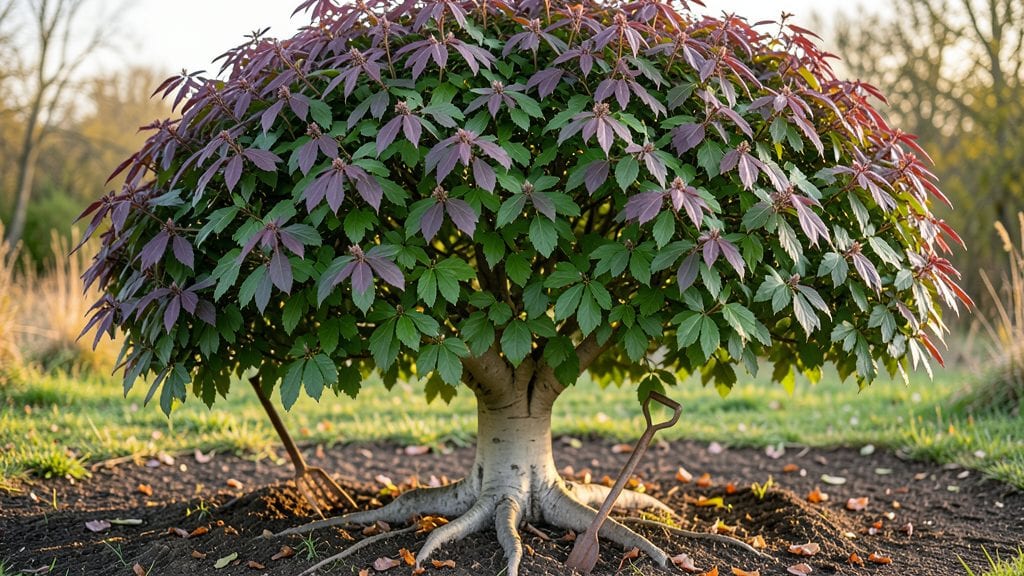
Planting outdoor trees the right way means roots establish in weeks instead of years—my fastest-growing privacy screen now blocks neighbors' views by next summer. 🌿 The secret isn't just digging a hole; it's about soil prep, tree selection, and a few simple tricks that make all the difference between a struggling sapling and a thriving shade provider.
Start with the right tools: a sharp shovel, compost, mulch, and stakes if needed. Choose fast-growing natives like arborvitae or Leyland cypress for privacy—they handle your climate better than showy imports.
Dig the hole twice as wide as the root ball but no deeper, then loosen the roots before setting the tree in place.
You'll see the first signs of success within weeks: firm soil around the roots, new leaves unfurling, and a sturdy trunk that won't flop in wind. Water deeply every 7-10 days after planting, and mulch to lock in moisture.
By year two, your screen will be dense enough to block noise and prying eyes completely.
This method works for any yard size or climate zone—just adjust watering and mulch thickness. The key is patience with the first year, but the payoff is a lush, low-maintenance screen that grows with you. Let's get those roots established for good.
📚 In This Guide
- What you need
- Instructions
- Tips and common mistakes
- Wrapping up and next steps
What you need
- ● Tree seedlings or saplings (3–10, depending on desired screen width): Fast-growing species: Leyland Cypress, Thuja Green Giant, or Bamboo (clumping variety)
- ● Height: 4–6 ft (mature height varies by species)
- ● Shovel or spade (1–2, depending on soil type)
- ● Garden gloves (1 pair, heavy-duty)
- ● Mulch (2–3 bags, 2–3 cubic feet each; pine straw, wood chips, or shredded bark)
- ● Organic compost or fertilizer (1 bag, balanced 10-10-10 or slow-release)
- ● Watering can or hose with nozzle (1)
- ● Measuring tape (1, for spacing)
- ○ Stakes & twine (optional but helpful for young trees)
- ● Soil tester kit (to check pH and nutrients)
- ● Root stimulator (for faster establishment)
- ● Drip irrigation system (for consistent watering)
- ● Tree guards or protective barriers (to deter pests)
- ● Pruning shears (for shaping as they grow)
Step-by-step guide to planting trees for fast roots and privacy
Here’s how to plant trees that establish quickly and grow into a lush, year-round screen.
🌱 Step 1: Choose the Right Spot and Dig the Hole
Select a location with 6+ hours of sunlight daily—most privacy trees thrive in full sun. Mark the planting spot with a stake and dig a hole twice as wide as the root ball but only as deep. This encourages roots to spread horizontally into the surrounding soil, which speeds up establishment.
Loosen the soil at the bottom of the hole with your hands or a trowel. Avoid compacting it further—roots need air and space to grow. If your soil is heavy clay, mix in a few handfuls of the native topsoil you removed to help drainage. The hole should sit slightly higher than the surrounding ground to prevent water pooling.
🪴 Step 2: Prepare the Tree and Plant with Care
Gently remove the tree from its container, loosening any circling roots with your fingers. If the root ball is tightly bound, score the edges with a knife to encourage outward growth. Place the tree in the hole so the top of the root ball sits 1-2 inches above ground level—this prevents rot and ensures stability as roots expand.
Backfill the hole with the native soil you dug out, tamping lightly every 4-6 inches to eliminate air pockets. Water deeply after planting to settle the soil and remove any gaps. Avoid over-tamping, which can compact the soil and suffocate roots. A slight mound around the base helps channel water away from the trunk.
☀️ Step 3: Water Deeply and Mulch for Fast Growth
Water the tree immediately after planting with 10-15 gallons of water, depending on the size. This saturates the root zone and encourages roots to spread outward. Let the water soak in completely before adding a 3-inch layer of mulch around the base, keeping it 6 inches away from the trunk to prevent rot.
Use organic mulch like wood chips or shredded bark to retain moisture and regulate soil temperature. Replenish mulch annually to maintain the layer. Avoid synthetic mulches—they don’t break down and can suffocate roots over time. Water weekly for the first 3 months, then taper to every 2-3 weeks once roots establish.
✂️ Step 4: Prune and Protect for Long-Term Health
Remove any broken, crossing, or diseased branches with clean, sharp pruners. Prune only to shape the tree—avoid heavy trimming, which stresses newly planted trees. Focus on opening the canopy to allow sunlight to reach the lower branches, which encourages fuller growth and faster privacy.
Install a tree guard or wire cage if deer or rabbits are a problem. These pests can girdle young trees before they establish. Water deeply during dry spells, and avoid fertilizing for the first 6-12 months—healthy roots need time to adapt before competing for nutrients. Within a year, your trees will be rooted deep and growing fast.
Tips & tricks for perfect outdoor planted trees
Planting trees for fast roots and privacy takes more than just digging a hole—here are the key tricks that'll make all the difference in your yard's transformation.
Location is Everything: While the instructions emphasize 6+ hours of sunlight, I can't stress enough how crucial this is for fast root development. If possible, choose a spot where trees get morning sun and afternoon shade—this prevents stress during hot afternoons. Also, avoid planting near large shrubs or structures that could compete for water and nutrients in their early years.
Root Ball Prep: In Step 2, when you're loosening those circling roots, take it a step further by scoring the edges of the root ball with a knife if it's tightly bound. This encourages roots to spread outward into the surrounding soil rather than staying confined. I've seen trees establish twice as fast when this step isn't skipped—it's worth the extra minute!
Watering Wisdom: The 10-15 gallons of water mentioned is a great starting point, but here's what nobody tells you: use a slow watering method like a soaker hose or drip irrigation. This prevents water from running off and ensures it penetrates deeply to encourage root growth. For the first week, I recommend watering twice daily—morning and evening—for 15 minutes each session to keep the root zone consistently moist.
Mulch Matters: That 3-inch layer of mulch isn't just decoration—it's insulation for your tree's roots. I like to add a second layer of mulch after the first year to maintain that protective barrier. Just remember to keep it 6 inches away from the trunk to prevent rot. For extra protection during winter, add an additional 2 inches of mulch in late fall to shield roots from freezing temperatures.
Pro Tips for Outdoor Planted Trees
- Planting trees for fast roots and privacy takes more than just digging a hole—here are the key tricks that'll make all the difference in your yard's transformation.
- Location is Everything: While the instructions emphasize 6+ hours of sunlight, I can't stress enough how crucial this is for fast root development.
- Root Ball Prep: In Step 2, when you're loosening those circling roots, take it a step further by scoring the edges of the root ball with a knife if it's tightly bound.
Frequently asked questions
Got questions about planting trees outdoors for privacy or aesthetics?
Here are some of the most common concerns—plus straightforward answers to help you make the best choices for your space.
What’s the best time of year to plant outdoor trees for privacy?
Spring and early fall are ideal! Spring lets roots establish before summer heat, while fall’s cooler temps reduce stress. Avoid extreme cold (winter) or scorching heat (summer). If you’re in a mild climate, late winter can work too—just water deeply afterward.
How close can I plant trees to my house or fence without causing damage?
Distance depends on the tree’s mature size. For small trees (under 30 ft), keep them 3–6 ft from foundations; larger trees need 15–25 ft. Check local codes—some areas require setbacks for roots or branches. Always dig a test hole to inspect soil and avoid underground utilities!
How often should I water newly planted trees?
Water deeply once a week for the first year (or more in hot/dry climates). Aim for 1–1.5 inches of water per session, soaking the root zone. Mulch helps retain moisture—just keep it 2–4 inches away from the trunk. Overwatering can suffocate roots, so let soil dry slightly between waterings.
Can I use potted trees as a temporary privacy screen?
Potted trees (like dwarf varieties or fast-growing options) are perfect for renters or short-term solutions. Just ensure pots have drainage holes and upgrade to larger containers as roots grow. Move them to permanent spots within 1–2 years for best growth.
What should I do if my planted tree’s leaves turn yellow or wilt?
Yellow leaves often signal overwatering, while wilting can mean underwatering or root stress. Check soil moisture (stick your finger 2 inches down—if dry, water). Pests (like spider mites) or nutrient deficiencies (add balanced fertilizer) might also be culprits. Prune damaged branches and monitor for improvement.
Are there fast-growing trees that still provide long-term privacy?
Yes! Consider Leyland cypress (3–4 ft/year), Thuja green giant (2–3 ft/year), or Bamboo (clumping types for containment). Research your climate—some trees (like willows) grow fast but have shorter lifespans. Balance speed with hardiness for lasting results!
Wrapping up and next steps
Planting outdoor trees is a rewarding way to enhance your space—whether you’re chasing fast-growing roots or a lush, year-round privacy screen. 🌳 From selecting the right species to mastering planting techniques, every step brings you closer to a greener, more serene backyard.
Now’s the perfect time to roll up your sleeves and get growing!
🌱 Your Next Step:
Start small—pick one tree from our guide, gather your tools, and dig in! Whether you’re a seasoned gardener or a beginner, every tree planted makes a difference. Ready to transform your outdoor space? Grab your shovel and let nature do the rest!