Vegetables
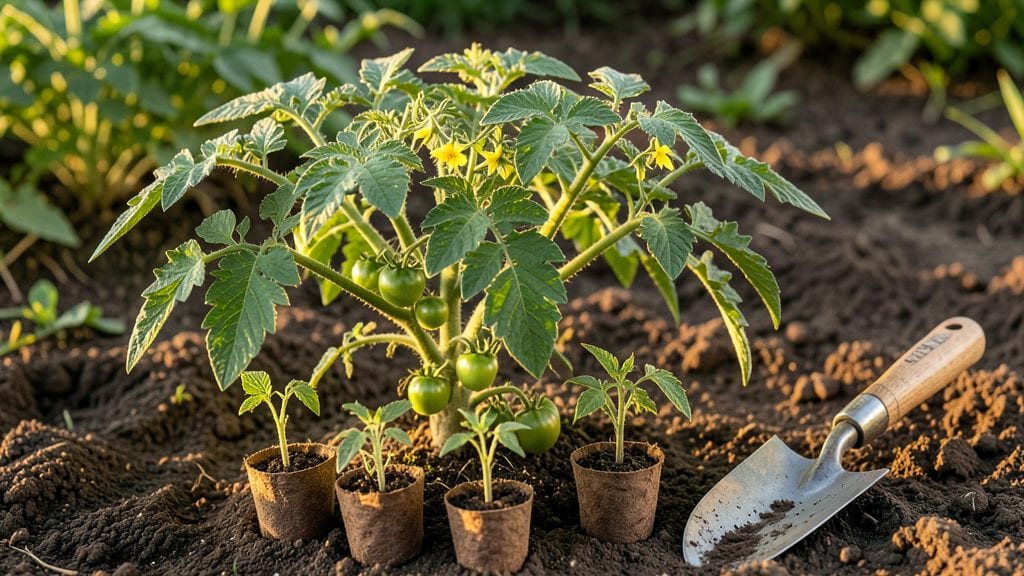
Planting tomatoes outdoors after the last frost date transforms your garden into a sun-drenched harvest factory. 🌱 I’ve planted tomatoes for over a decade, and the difference between a thriving vine and a struggling one comes down to just a few key choices—location, soil prep, and variety selection.
Most people skip the soil test or plant too close together, which leads to weak plants and fewer fruits. But when you nail these basics, you’ll end up with plants that look like they belong in a greenhouse, not your backyard.
The secret isn’t complicated: pick a spot that gets at least 6-8 hours of sun, loosen the soil with compost or aged manure, and choose a variety that matches your growing season.
Determinate tomatoes (like Roma) stay compact and produce all at once, while indeterminate types (like Cherry) keep growing and fruiting all summer. I’ve found that planting 18-24 inches apart gives roots room to breathe, and burying the stem deeper than usual encourages stronger root growth from the buried part.
Once they’re in the ground, keep the soil consistently moist but not soggy—think of it like a wrung-out sponge. A 2-3 inch layer of mulch right after planting locks in moisture and keeps weeds at bay.
Within 2-3 weeks, you’ll see new leaves unfurling, and by midsummer, you’ll be picking tomatoes that taste like nothing from the store. The best part? You’ll avoid the most common mistakes—overcrowding, poor drainage, and ignoring the plant’s natural growth habits.
This method works for gardeners in zones 5-10, whether you’re growing in raised beds, containers, or traditional rows. The key is adapting the spacing and support (like cages or stakes) to your setup.
Ready to turn your sunny patch into a tomato powerhouse? Let’s get those seeds—or seedlings—in the ground.
📚 In This Guide
- What you need
- Instructions
- Tips and common mistakes
- Wrapping up and next steps
What you need
- ● Tomato seedlings or seeds: 3–6 plants (depending on space; choose disease-resistant varieties like Celebrity or Roma for beginners).
- ● Garden soil or potting mix: 1–2 bags (rich in compost; avoid garden soil with pests or diseases).
- ● Balanced fertilizer (10-10-10 or 5-10-10): 1–2 lbs (for planting and side-dressing).
- ● Organic mulch (straw, grass clippings, or wood chips): 2–3 inches (to retain moisture and suppress weeds).
- ● Tomato cages or stakes: 3–6 (6-foot tall for indeterminate varieties; 4-foot for determinate).
- ● Garden trowel or shovel: 1 (for digging holes).
- ● Watering can or hose with nozzle: 1 (gentle spray setting to avoid damaging seedlings).
- ● Epsom salt: 1 tbsp (mixed with water; boosts magnesium for green, leafy growth).
- ● Coffee grounds: ½ cup (sprinkled around plants; adds nitrogen and deters pests).
- ● Plant collars or garden flags: 3–6 (to mark rows and prevent soil-borne diseases).
- ● Pruning shears: 1 (for trimming suckers and dead leaves later in the season).
- ● Shade cloth (30–50% coverage): 1 roll (protects seedlings from harsh afternoon sun if needed).
- ● Last frost date: Confirm your local last frost date (plant after all danger of frost has passed).
- ● Sunlight access: A spot with 6–8+ hours of direct sun daily (tomatoes are sun-worshippers!).
- ● Well-draining soil: Test or amend soil to pH 6.0–6.8 (use a soil test kit if unsure).
- ● Space: 18–24 inches apart (for determinate varieties) or 24–36 inches (for indeterminate).
How to plant tomatoes outdoors for a thriving harvest
Ready to grow your own tomatoes? Here's my foolproof method for planting strong, sun-loving plants that produce all season.
☀️ Step 1: Choose the Perfect Planting Spot
Tomatoes need 6-8 hours of direct sunlight daily. Scout your yard for a location where they'll get morning sun and afternoon shade if your climate runs hot. Avoid low spots where cold air settles—tomatoes hate chilly feet. I always test the spot by observing how long it stays sunny during the day.
If you're replanting where last year's tomatoes grew, move your new plants at least 2 feet away to prevent soil-borne diseases. The best planting time is after your last frost date when soil temperatures reach 60°F—use a soil thermometer if you're unsure. You'll know it's time when nearby perennials start actively growing.
🪴 Step 2: Prepare the Soil for Healthy Roots
Loosen the soil to a depth of 12-18 inches with a garden fork or tiller. Tomatoes hate compacted soil because it restricts root growth. Mix in 2-3 inches of compost or aged manure to improve fertility and drainage. I like to add a handful of balanced fertilizer (10-10-10) at planting time for an immediate boost.
For container-grown plants, dig a hole twice as wide as the root ball but no deeper. This encourages roots to spread outward rather than circling at the bottom. Gently tease apart any root-bound roots before placing the plant in the hole. You'll see the difference in plant vigor within weeks.
🌱 Step 3: Plant Transplants at the Right Depth
Remove your tomato plants from their containers and inspect the stems. Bury them 1/3 deeper than they were in the pot—this encourages stronger root growth from the buried stem. For indeterminate varieties (the vining types), I often bury up to half the stem to create a sturdy base. Space plants 18-24 inches apart in rows 3 feet apart.
Place each plant in its hole, then fill with soil while gently pressing down to remove air pockets. Water thoroughly until the soil is evenly moist to 6 inches deep. You'll know you've watered enough when water runs out the bottom of the hole. Avoid wetting the leaves to prevent disease.
✂️ Step 4: Provide Support and Prune for Better Growth
Install your tomato cages or stakes immediately after planting. I prefer 6-foot bamboo stakes for indeterminate varieties because they're more stable than cages in windy conditions. Tie the main stem loosely to the support with soft plant ties—too-tight ties can girdle the stem as it grows.
For determinate (bush) tomatoes, remove the suckers (the small shoots that form in the leaf axils) when they're 2-3 inches long. For indeterminate varieties, I let the first few suckers grow to encourage bushier plants. Pinch off any flowers that appear on the first few inches of stem—they'll produce weak fruit and divert energy from root establishment.
💧 Step 5: Water Deeply and Mulch to Retain Moisture
Water your newly planted tomatoes 1-2 inches per week, aiming for deep, infrequent watering rather than light daily sprinkles. Water at the base in the morning so foliage has time to dry before evening. I use a soaker hose buried 2 inches deep to deliver water directly to the roots without wetting leaves.
Spread 2-3 inches of mulch around each plant, keeping it 2 inches away from the stem to prevent rot. Organic mulches like straw or shredded leaves also improve soil structure as they break down. You'll notice fewer weeds and more consistent soil moisture after mulching.
🌿 Step 6: Monitor and Maintain for Continuous Production
Check your plants weekly for early signs of pests or diseases. Remove any yellowing leaves promptly—they can harbor fungal spores. I always spray plants with a 1% baking soda solution (1 tablespoon baking soda per gallon of water) every 2 weeks as a preventive measure against early blight.
Fertilize again when flowers appear with a 5-10-10 formula to promote fruiting. Side-dress with compost every 4-6 weeks during the growing season. You'll see the difference in fruit size and plant vigor within a month of proper feeding.
Tips & tricks for perfect planting tomatoes outdoors
These simple strategies will help you avoid common pitfalls and maximize your tomato harvest with minimal effort.
Sunlight Timing: The 6-8 hours of sunlight requirement is non-negotiable, but here's the trick: if you notice your plants wilting by late afternoon, they're getting too much midday heat. In hot climates, provide afternoon shade with a simple shade cloth—your plants will thank you with fewer stressed leaves and better fruit set. I've seen tomato plants in full sun all day produce smaller fruit compared to those with afternoon shade during peak summer heat.
Soil Prep Secret: When loosening soil to 12-18 inches in Step 2, don't just poke around—break up any large clumps and create vertical channels with your fork. This helps roots penetrate deeper and access moisture during dry spells. For heavy clay soil, mix in a handful of coarse sand along with your compost to improve drainage. The difference in root development is dramatic after just one season.
Planting Depth Hack: That 1/3 deeper planting in Step 3 works wonders, but here's what nobody tells you: if you're planting in cooler climates, you can go even deeper—up to half the stem—since the buried portion will generate new roots that stay warmer. Just make sure to remove any lower leaves that might end up underground to prevent rot. This technique helps establish plants faster in spring.
Watering Wisdom: The 1-2 inches per week guideline is perfect, but timing matters just as much. I've found that watering in the morning gives foliage time to dry completely before evening, which dramatically reduces fungal diseases like early blight. For containers, check moisture daily—they dry out faster than in-ground plants. A simple finger test (stick your finger 2 inches into soil) tells you when it's time to water.
Pro Tips for Planting Tomatoes Outdoors
- These simple strategies will help you avoid common pitfalls and maximize your tomato harvest with minimal effort.
- Sunlight Timing: The 6-8 hours of sunlight requirement is non-negotiable, but here's the trick: if you notice your plants wilting by late afternoon, they're getting too much midday heat.
- Soil Prep Secret: When loosening soil to 12-18 inches in Step 2, don't just poke around—break up any large clumps and create vertical channels with your fork.
Frequently asked questions
Got questions about planting tomatoes outdoors? You’re not alone! Here are answers to some of the most common queries to help you grow a thriving crop with confidence.
When is the best time to plant tomatoes outdoors?
The ideal time depends on your climate. Plant after the last frost when soil temperatures reach at least 60°F (15°C). In warm regions, this could be as early as February; in cooler zones, wait until May or June. Use a soil thermometer to check—tomatoes thrive in warmth!
Can I plant tomatoes too early?
Yes, but it risks stunted growth or frost damage. If nighttime temps dip below 50°F (10°C), protect seedlings with row covers or move pots indoors. Early planting also increases disease risk. Wait for consistent warmth to avoid setbacks.
What if my outdoor space has poor soil?
No worries! Tomatoes grow well in containers or raised beds with well-draining, nutrient-rich soil. Mix compost or aged manure into native soil, or use potting mix for containers. Avoid heavy clay—amend with perlite or sand for better aeration.
How do I protect tomatoes from pests outdoors?
Prevent pests with physical barriers like netting (for birds/squash bugs) and row covers (for early-season bugs). Remove yellowed leaves to deter aphids. For organic control, spray neem oil or introduce ladybugs. Monitor plants regularly for early signs of trouble!
Why aren’t my tomato plants fruiting?
Common culprits include lack of sunlight (6+ hours daily), stress from temperature swings, or over-fertilizing with nitrogen. Ensure consistent watering and balance fertilizer with phosphorus/potassium. If flowers drop, check for pollen issues—gentle shaking can help.
Wrapping up and next steps
Planting tomatoes outdoors is a rewarding journey that brings fresh, flavorful harvests right to your doorstep! 🌱 With the right soil, sunlight, and care, you’ll soon be enjoying homegrown tomatoes that outshine store-bought varieties. Start small, stay patient, and soon you’ll be savoring the fruits of your labor—literally!
Ready to take the next step? Grab your gloves and head outside—your tomato plants are waiting! 🌞 Whether you’re a first-time gardener or a seasoned pro, every seed you plant is a step toward a bountiful harvest. Happy growing!